Using the ExpressDesign Wizard
Create a Petal Design with the ExpressDesign Wizard
-
Click File, New

, or File, New Window

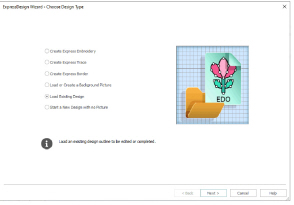
and the Choose Design Type page of the ExpressDesign Wizard will appear.
-
Leave Create Express Embroidery selected and click Next. The Choose Picture page will appear.
-
Click Load a Picture
 and the viewer will appear.
 -
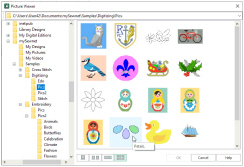
In the Picture Viewer, browse to Documents\mySewnet\Samples\Digitizing \Pics. The pictures in the folder will be shown.
If you position the arrow pointer over a thumbnail without clicking, the name of the picture will be shown. The picture to be used is called ’Petals.svg'. Alternatively, select an icon display that shows the names. -
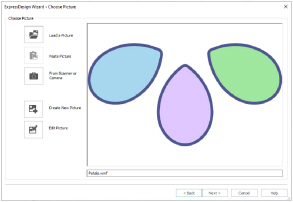
Click the 'Petals.svg' thumbnail, and then click OK. The picture is loaded onto the Choose Picture page, with its name shown below the preview area.
-
Click Next and the Rotate and Crop Picture page will appear.
Notice that the picture has no background color yet. This is because pictures in Scalable Vector Graphics (svg) format can have an empty background. However, after the picture is cropped, white is used by the ExpressDesign Wizard to replace empty areas. -
No adjustment of the crop area is required, so click Next and the Design Size page will appear.
-
In Design Size, select Fit Design To Hoop.
-
Click Change Hoop and the Hoop Selection dialog box appears.
-
Under Enter Size, ensure that Enter Hoop size is not selected (checked).
-
Select the Universal Hoop Group, then set Hoop Size to 240mm x 150mm - Universal Large Hoop 2. Ensure the Orientation is Rotated, and click OK. The chosen hoop is previewed.
-
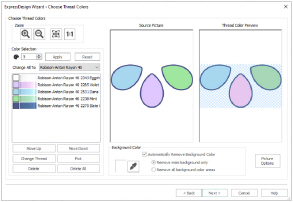
Click Next and the Choose Thread Colors page will appear. Notice that all 5 of the 5 possible colors have been automatically picked.
-
If the thread range in the Change All To box is not set to Robison-Anton Rayon 40, click the drop-down arrow at the end and select Robison-Anton Rayon 40.
-
Under Background Color, the large white square shows that white is the detected background color. The white background is not required, so ensure Automatically Remove Background Color is selected. A check pattern in the Thread Color Preview shows where there will be no stitches.
-
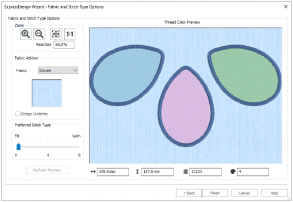
Click Next. Stitches will be created, then the Fabric and Stitch Type Options page will appear.
-
Ensure that the Fabric is set to Woven.
Notice that the design is previewed on the selected fabric. This may differ from the fabric selected in mySewnet™ Configure, but the background color chosen in mySewnet™ Configure is always used. -
Ensure the Design Underlay option is turned off and leave the Preferred Stitch Type slider all the way to the left.
Some of the petals will be changed to lightly stitched fill patterns that would reveal the underlay if it is left on. -
Click Finish and the final design and its picture are shown on the work area.
-
Click the Edit button
 next to the Notes box on the Design Panel.
 -
In the Notes dialog box enter 'Floral'.
-
Use the quick keyword selector to add the keywords ’Flowers and Gardens’. Then click OK.
-
Click Save
 and browse to the folder Documents\mySewnet\My Designs.
 -
Change the File name to 'PetalsBasicFill' and click Save.

When white thread is not desired in the background of an Express Embroidery, it may be removed on the Choose Thread Colors page. The white background is ignored by Express Trace and Express Border.
If you have changed any of the settings, you must click Refresh Preview before using Finish.
Notes entered for the design will also be saved in the embroidery when it is exported in .vp4 format. Notes are used to search for embroideries by key words in Windows® Explorer.
This saves your project as a design file in .edo format.
Use this design to create a variety of filled petals. See:
-
Pattern Fill Petals: Change a Fill Area to a Leaf Pattern, Create a Single Color Gradient Fill in a Petal and Use a Bee for a My Fill Pattern.
-
Density Effect Petals: Fill a Petal with a Multicolor Gradient Density Fill, Use a Radial Fill in a Petal and Fill a Petal with a Spiral Fill with Gradient Density.
-
Shape Fill Petals: Use Shape Fills in Three Petals.
-
Motif Line and Fill Petals: Use Motif Fills in Two Petals and Create a Flower with Motif Lines.
Create Appliqué Areas with Express Border
-
Click New
 or File, New Window. The Choose Design Type page of the ExpressDesign Wizard will appear.
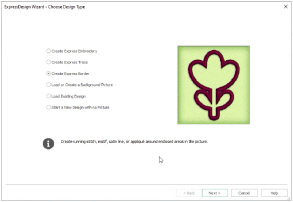
-
Click Create Express Border
 .
. -
Click Next and the Choose Picture page will appear.
-
Click Load a Picture
 . In Documents\mySewnet\Samples\Digitizing\Pics, click the 'Petals.svg' thumbnail, then click OK. The picture will be loaded onto the Choose Picture page.
 -
Click Next and the Rotate and Crop Picture page will appear.
-
No rotation or adjustment of crop lines is required, so click Next and the Monochrome Threshold page will appear.
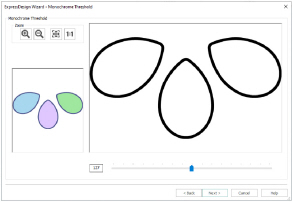
Only the thick outlines are dark enough to show at the default Monochrome Threshold. They make three fully enclosed shapes that will become solid shapes later in the ExpressDesign Wizard.
Move the slider to view which parts of the picture are selected at different Monochrome Threshold levels, then return the slider to its original position. -
Click Next and the Design Size page will appear.
-
Select Fit Design To Hoop.
-
Click Change Hoop, and in the Hoop Selection dialog box, select 240mm x 150mm - Universal Large Hoop 2 with Rotated Orientation.
 Click OK.
 -
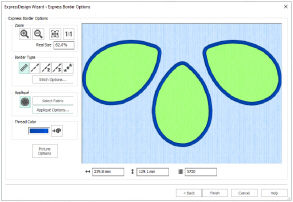
Click Next. The picture will be processed and the Express Border Options page will appear.
-
In Border Type, ensure that Satin Line
 is selected.
 -
Click Stitch Options.
-
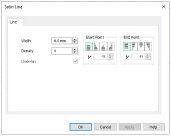
In the Satin Line dialog box set Width to 4.0mm, and ensure that Underlay is selected (checked).
-
Click OK to close the Satin Line dialog box.
-
Ensure that Appliqué
 is selected. The preview shows the areas where appliqué fabric will be stitched.
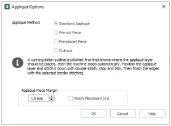
-
Click Appliqué Options and the Appliqué Options dialog box will appear.
-
Ensure that Standard Appliqué is selected.
-
Click OK.
-
Click the Thread Color icon
 and the Color Selection dialog box will appear.
 -
Ensure the Thread Range is set to Robison-Anton Rayon 40. Type 2275 in the Find Thread box to select 2275 (Slate Blue).
This matches the border color that was automatically selected for the Express Embroidery in Create a Petal Design with the ExpressDesign Wizard. -
Click OK. The border lines in the preview are updated to show the new thread color.
-
Click Finish. The new design is shown on the work area.
Notice that the petals in the background picture are solid areas of color, indicating it is an appliqué section. -
In the Design Panel, click the Edit button
 next to the Notes and Settings box.
 -
In the Notes dialog box enter 'Floral'.
-
Use the quick keyword selector to add the keywords ’Flowers and Gardens’. Then click OK.
-
Click Save
 . Browse to the folder Documents\mySewnet\My Designs. Change the File name to 'PetalsBasicApplique' and click Save to save the design as an .edo file.
Use this design to create a variety of appliqué petals. See:
-
PetalsAppliqué1: Change Satin Line to Motif Line in an Appliqué Petal and Insert QuiltStipple Fill in a Petal.
-
PetalsAppliqué2: Change Satin Line to Picot Motif Line, Insert Motif Fill in an Appliqué Petal and Create a Contour Fill Flower.
Load PetalsBasicApplique in the ExpressDesign Wizard
-
Click File, New

, or File, New Window

and the Choose Design Type page of the ExpressDesign Wizard will appear.
-
Select the Load Existing Design option.
-
Click Next and the Open Existing Design page will appear.
-
Click Load a Design
 .
. -
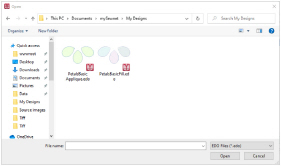
Browse to the folder Documents\mySewnet\Samples\Digitizing \Edo.
Alternatively, use the file you created in Create Appliqué Areas with Express Border. -
Click OK and the designs in the folder will be shown.
-
Click the 'PetalsBasicApplique' thumbnail. The viewer will close and the design will be loaded onto the preview area.
The full name of the design is shown below, it is called 'PetalsBasicApplique.edo'. -
Click Finish and the design will be loaded onto the work area.
Load a Fleur de Lys as a Background Picture
-
In the Quick Access toolbar, click Change Hoop
 and the Hoop Selection dialog box appears.
 -
Ensure that Enter Hoop Size is not selected.
-
Ensure the Hoop Group is set to Universal. Click the drop-down arrow for Hoop Size and select 100mm x 100mm - Universal Square Hoop 1. Click OK.
-
Click the View tab, and ensure that Grid size is set to 5mm.
-
Click File, Preferences
 , and ensure that Color Tolerance is selected (checked), and that Tie Off Before and After Trims is selected.
 -
Click File, New

, or File, New Window

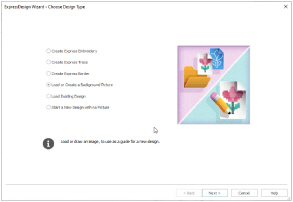
and the Choose Design Type page of the ExpressDesign Wizard will appear.
-
Click Load or Create a Background Picture, then click Next.
-
Click Load a Picture
 and the viewer will appear.
 -
In the Picture Viewer dialog box, browse to Documents\mySewnet\Samples\Digitizing\Pics.
-
Click to select 'Fleur de lys.svg', then click OK. The picture will be loaded onto the Choose Picture page, with its name shown below the preview area.
-
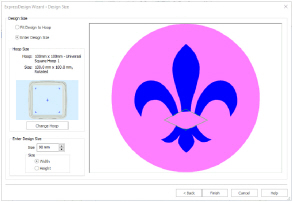
Click Next and the Design Size page will appear.
-
Click Enter Design Size.
-
Change the Size to 90mm and click Width.
-
Click Finish. The picture will be shown on the work area.