Radial fill areas ![]() use a pattern of radiating lines from an origin point
use a pattern of radiating lines from an origin point  that can be moved. Vary the stitch density and add holes.
|
|
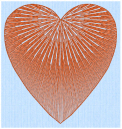
Radial Fill with origin moved to top of heart |
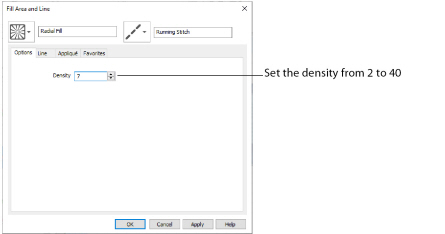
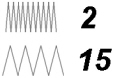
Set Density from 2 to 40. The lower the number, the closer together the stitches and the more stitches are produced.The initial setting is 20.
-
Click File, New

, or File, New Window

, and in the Choose Design Type page of the ExpressDesign Wizard select Load Existing Design, then click Next. In the Open Existing design page, click Load a Design
 , browse to the folder Documents\mySewnet\Samples\Digitizing\Edo, and load the file 'PetalsBasicFill'.
 -
Click File, Preferences
 and ensure that Color Tolerance is selected (checked), and that Tie Off Before and After Trims is selected.
 -
Click the View tab, and ensure that Grid size is set to 5mm.
-
Click inside the petal on the left to select the fill area. It will be shown as a Pattern Fill on the status bar.
-
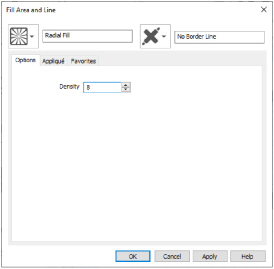
Right-click on the work area and the Fill Area and Line dialog box will appear.
-
In the Fill drop-down menu at the top left, select Radial Fill
 . The options in the tabbed pages below change.
 -
The Options tab is initially selected. Set the Density to 8. This gives a lightly stitched, but distinctive, radial fill pattern.
-
Click OK. The description of the area on the status bar will change to Radial Fill.
Notice that the stitch lines of the radial fill radiate from the middle of the petal shape.
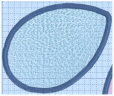
The stitch lines radiate from the origin.
Move the origin to the top right.
Click outside to view the radial fill.
-
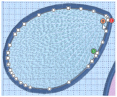
Click and drag the origin marker
 of the radial fill up and to the right until it is about one grid square from the corner of the petal.
The origin is the start point for the repeating pattern in a pattern fill and the point from which stitches radiate in a radial fill, shape fill or spiral fill.
 -
Click outside the petal, so that the fill area is no longer selected. You can now see the effect of moving the origin.
-
Click Zoom To Fit
 .
.
Alternatively, use the petals design that you created in Create a Petal Design with the ExpressDesign Wizard, and added a multicolor gradient fill in Fill a Petal with a Multicolor Gradient Density Fill.
The tabbed pages in the Fill Area and Line dialog box show the properties for the currently selected Fill and Line.
To fill the right petal with a spiral fill, see Fill a Petal with a Spiral Fill with Gradient Density.