Motif fill areas contain repeated small stitches placed using one of the Universal or machine motif patterns. Motif patterns typically have spaces between the stitches. The motifs can be at any angle and at different sizes, and different motifs can be used on alternating lines.
|
|
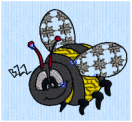
The bumblebee wings are in a Motif Fill Area, using motif 44 from Candlewicking 1 |
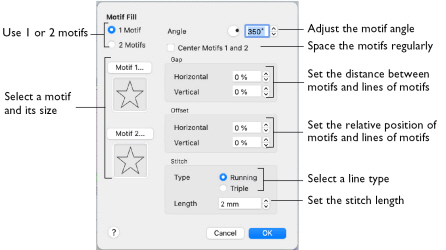
In the Motif Fill dialog you can select motifs, and set the motif angle, spacing, offset, stitch type and length when creating a motif fill area. Use Motif 1 to select the first motif and its size, and Motif 2 for a second optional motif.
To show the Motif Fill dialog
-
With a motif fill area selected, Control–click and choose Edit Motif Fill.
-
With a motif fill area selected, click the Properties button.
-
Convert a fill area to Motif Fill in the Object window. The Properties dialog appears.
Motifs
Set the number of motifs in the fill to 1 or 2, and select the motif(s) and their size. A second motif is placed on alternating lines with the first motif.
To select motifs for a fill
-
Decide whether to use 1 or 2 motifs, then click the Motif 1 or Motif 2 button to open the Motif Selection dialog. See Motif Selection.
Angle
Change the angle of the motif fill pattern from 0 to 359 degrees.
Center Motifs 1 and 2
When selected, extra stitches are added to either side of the narrower of the two motifs, so it is the same width as the wider motif. The motifs then can be centered, and any horizontal offset between them is constant.
Gap
Use Horizontal gap to add or remove space between motifs along a line, and Vertical gap to add or remove space between lines of motifs. Horizontal and Vertical gap can be set from -50% to +100%.
Offset
Use Horizontal offset to move motifs along a line, relative to their position in the previous line. Use Vertical offset to adjust the position of a line of motifs, relative to the previous line of motifs. Horizontal and Vertical offset can be set from -50% to 50%.
Stitch
Select between Running and Triple stitch for stitching out the motif line. Set the maximum stitch Length from 1 to 12mm in steps of 0.1mm.