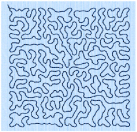
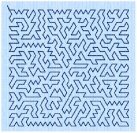
QuiltStipple fill areas use stipple stitch in curved or straight lines. Vary the gap between stitch lines and use running or triple stitch.
|
|
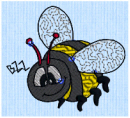
The bumblebee wings are in QuiltStipple Fill using a curved style |
To show the QuiltStipple Fill dialog
-
With a QuiltStipple fill area selected, Control–click and choose Edit QuiltStipple Fill.
-
With a QuiltStipple fill area selected, click the Properties button.
-
Convert a fill area to QuiltStipple Fill in the Object window. The Properties dialog appears.
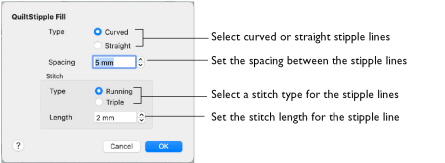
Type
Use straight or curved QuiltStipple lines in the fill.
-
Select between curved or straight fill lines.
Spacing
Use Spacing to set the preferred distance between lines of stitching. The distance can be set from 1 to 20mm in steps of 0.1mm. It is initially set to 5.0mm.
Note: Where possible, this is also the border inside the area, between the edge of the area and the fill pattern.
-
Click the Spacing up and down arrows, or enter a number.
Stitch
Use Stitch to select the stitch type for stitching out the fill, and the length of the stitches used. Set stitch length from 1 to 12mm in steps of 0.1mm. The initial setting is 2mm.
-
Select Running or Triple stitch, and click the Length up and down arrows, or enter a number.