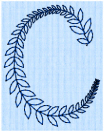
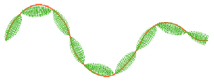
Tapered Motifs form columns of motifs that vary in size according to the width of the column. Tapered motifs are often used in lace designs.
Use the Tapered Motifs dialog to set the motif type, stitch type, and placement method.
To show the Tapered Motifs dialog
-
With a Tapered Motifs column selected, Control–click and choose Edit Tapered Motifs.
-
With a Tapered Motifs column selected, click the Properties button.
-
Convert another column type to Tapered Motifs in the Object window. The Properties dialog appears.
Adjust a Column of Tapered Motifs
-
Open an embroidery including satin columns, and select a column.
-
In the Convert pop-up menu choose "Satin Column to Tapered Motifs".
-
Click Convert. The Tapered Motifs properties dialog appears.
-
Use the Tapered Motifs dialog to set the motif, stitch length and either the number of motifs or the gap between them. Click OK to convert the column.
-
Drag the points making up the column to change its shape.
-
Use Shift–click when moving a point to make the point square, and create a straight section.
-
Click Insert Points
 , then click to add a pair of points to the column.
 -
Click Delete Points
 and click the pair of points you just added. They are removed from the design. Control–click and choose Finish Delete Points Tool to deselect Delete Points.
 -
With the column selected, Control–click and choose Edit Tapered Motifs to open the Tapered Motifs properties dialog. Alternatively, click the Properties button.
-
Make any desired changes to the settings, then click OK to finish.
Note: You can change to any other type of column.
Motif
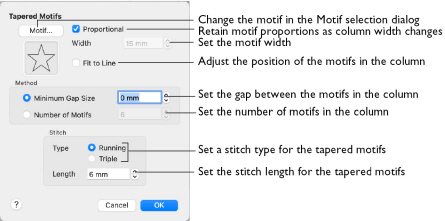
Select the motif in the Motif selection dialog.
To select tapered motifs
-
Click the Motif button to open the Motif selection dialog. See Motif Selection.
Note: As the motif size is set by the column width, the size functions are dimmed in the Motif Selection dialog.
Proportional
Use this option to keep the relative height and width of the motif in proportion when the column width is changed. This option is selected by default.
Width
The Width is initially set according to the chosen motif. The maximum and minimum values for Width are individual to each motif.
Fit To Line
Select how the motifs follow the curves of the line.
|
|
|
|
When Fit To Line is off, the ends of each motif are placed on the line. |
When Fit To Line is on, each whole motif is adjusted to fit along the line. |
Method
Minimum Gap Size
The Minimum Gap is the minimum amount of extra stitching that is placed between the motifs along the line. This is in addition to any spacing that is part of the selected motif.
Number of Motifs
Set the number of Motifs from 2 to 50. The initial number is 6.
Stitch
Type
Select Running or Triple stitch for stitching out the motifs.
Length
Set the Length of stitches from 1 to 20mm in steps of 0.1mm. Length is initially set to the recommended value for each motif.
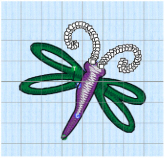
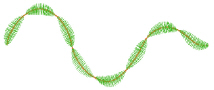
Create Textured Antennae for a Dragonfly Embroidery
-
If required, choose File > New.
-
In the folder mySewnet/Samples/Stitch Editor/Stitch, open the Perky Dragonfly embroidery to load it.
-
Select the Object
 window of the Control Panel
  . The pointer changes to the Object Select
  pointer.
Note: All of the icons are unavailable (dimmed) as no area of stitches is selected. -
Command–click to select both of the antennae.
The main stitch type in the antennae is Satin Column. -
In the Convert pop-up menu, select "Satin Column to Tapered Motifs".
If any stitch type other than Satin Column is listed as the stitch type to convert from, deselect and select again. -
Click Convert. The Tapered Motifs properties dialog appears.
-
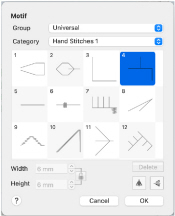
Click the Motif button to change the motif used.
-
In the Motif dialog set the Motif Group to Universal and the Category to Hand Stitches 1.
-
Set the Pattern to 4, a blanket stitch.
-
Leave the other settings unchanged, and click OK twice to close both dialogs.
-
Click outside the dragonfly to view the changed antennae.
Some of the underlay lines may still be present. However, this is not a problem as it adds a texturing effect.