Use Freehand Select ![]() to select a block of stitches within an area of any shape. Click Freehand Select and the pointer changes to the freehand select pointer
to select a block of stitches within an area of any shape. Click Freehand Select and the pointer changes to the freehand select pointer  , then click and drag to draw an irregular outline around the desired area. When you release the mouse the area is closed automatically with a straight line between the last mouse position and the start position.
Use Add to Selection

with any select function to increase the area of selected stitches, or use Remove from Selection

to make the currently selected area smaller.
Freehand Select is useful when an area cannot be easily selected by using the simpler Box Select function. It is particularly useful to highlight part of a color area which could not otherwise be easily selected.
The block can be moved, scaled and/or resized, mirrored horizontally and vertically and rotated to any degree. The block can be copied or cut to the clipboard and then pasted to the same or another embroidery. The block can also be deleted.
If the wrong area is selected, click in the active window, but outside the box, to deselect.
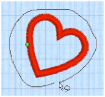
Select a Heart with Freehand Select
-
Click the Hoop icon

and set the hoop size to 240mm x 150mm - Universal Large Hoop 2, Rotated orientation. Click OK.
-
Click File, New

to open a new window.
-
In the Quick Access toolbar, click Insert

.
-
Browse to the folder Documents\mySewnet\Samples\Stitch Editor\Stitch.
-
Scroll down and load the 'Hearts and Lace’ embroidery.
-
Zoom in

to the area to the right with the small hearts.
-
Click Freehand Select

. The pointer changes to the Freehand select pointer

.
-
Click and drag to draw an irregular outline most of the way around one of the small hearts to the right, then release the mouse button.
-
Click outside the block to make a new selection using this method.
-
Right-click to deselect.
When you release the mouse the area is closed automatically with a straight line between the last mouse position and the start position, and the heart is surrounded by a selection box.
Shortcuts
-
Select, Home Tab; Status Bar:

-
Keys: Alt, H, FS