Use Insert Lettering  to insert lettering from any mySewnet™ Embroidery Software font into the current design. The first object in the inserted character is placed after the selected object or the last visible object in the design. The character is also placed as a group so that it can be moved, resized, mirrored, rotated, copied or cut. Characters are inserted at the selected size relative to the 'A' character in the font.
Shortcuts
-
Home Tab:

-
Keys: Alt, H, IL
Insert Lettering in a Design
-
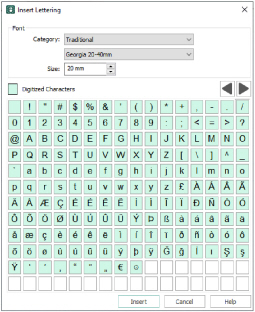
In the Home tab click the Insert Lettering icon

and the Insert Lettering dialog box will appear.
-
Click the drop-down arrow next to the font Category and select the desired category.
-
Click the drop-down arrow next to the font name and select the desired font. The available characters in the font will be highlighted in the table.
-
Click the desired character and it will be shown highlighted.
-
Click Insert. The character will appear on the work area as a group, so you can adjust it as desired.
-
Repeat to place additional characters as desired.
Only characters that have been created for the font may be selected.
Alternatively, double-click to insert the character.
Subsequent characters are placed to the right of the previous character, creating a line of text that can be selected, moved and adjusted as desired.