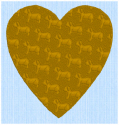
Use Create Point Area or Line ![]() to place points to define the edge of an area filled with small stitches in repeating patterns, and surrounded by a border.
to place points to define the edge of an area filled with small stitches in repeating patterns, and surrounded by a border.
Select Create Point Area or Line
-
In the Point Create toolbar, click the Create Point Area or Line
 button.
 -
Choose Create > Create Area or Line > Point Area or Line.
-
Press ^F
Using Create Point Area or Line
-
Select the Point Create
 toolbar.
 -
Select your fill and border type. See Select a Stitch Type.
-
Click to place the first point for the edge of the desired area.
-
Continue placing points around the desired area, such as a chosen section of the background picture.
If you are following the picture, place a point every time the direction of the picture outline changes. A curved line is drawn. -
To create a corner or straight edge, hold down the Shift key when placing a point.
-
To change the position of an existing point, move the pointer over it until the point becomes the cross pointer
 , then drag the point.
 -
Double-click or press Return to complete the area.
-
Continue to place as many fill areas as desired.
-
Control–click and choose Finish Point Area or Line to deselect, or simply select another Create tool.
-
To edit the fill or the border, or to add appliqué, click the fill area to select it, then Control–click it, choose Properties, and change the properties in the Area Properties dialog. Click OK to save the changes. See Area Properties.
-
To edit several fills, select a group with Command–click or Shift–click in the FilmStrip, then Control–click and choose Properties to open the Area Properties dialog. To edit all visible fills of that type, Control–click and choose Global Properties.
-
On the work area, change the shape of the area by dragging points, or move the start
 , end
, end  and/or origin
  for fill areas. See Adjust a Fill Area.
Note: To draw the outline for a Line or Fill Area with Bezier Lines instead of Point Lines, click Bezier Mode
to enable drawing Bezier curves, then draw your Line or Fill Area. See Bezier Mode.
Mitered Corners and Closed Shapes
When creating a satin line by placing points, the corners of a satin border are mitered automatically when you hold down Shift and click to place a corner point.
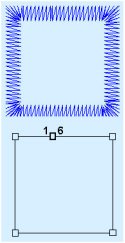
If you want to make a closed shape with mitered corners, such as a square or rectangle, join the shape in the middle of one of the sides, as shown in the example. If the shape is joined at a corner, that corner will not be mitered as it will simply be two straight end points in the same place, rather than a true corner.

Note: When drawing this type of satin line shape, overlap the start and end points slightly to ensure a neat join.
Note: You can also create mitered corners in the Satin Line and Motif Line properties. See Satin Line and Motif Line.