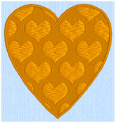
Use Create Freehand Area or Line ![]() to draw a line to define the edge of an area filled with small stitches in repeating patterns, and surrounded by a border.
to draw a line to define the edge of an area filled with small stitches in repeating patterns, and surrounded by a border.
Select Create Freehand Area or Line
-
In the Freehand Create toolbar, click the Create Freehand Area or Line
 button.
 -
Choose Create > Create Area or Line > Freehand Area or Line.
-
Press ^⌥F
Using Create Freehand Area or Line
-
Select the Freehand Create
 toolbar.
 -
Select your fill and line type. See Select a Stitch Type.
-
Draw a line around the edge of the desired area.
-
When the area is complete, lift the pen from the tablet (or release the mouse button). The area is closed with a straight line back to the start point, and filled with stitches using the border and fill type that you chose.
-
Continue to draw as many fill areas as desired.
-
Control–click and choose Finish Freehand Area or Line Tool to deselect, or simply select another Create tool.
-
To edit the fill or the border, or to add appliqué, click the fill area to select it, then Control–click it, choose Properties, and change the properties in the Area Properties dialog. Click OK to save the changes. See Area Properties.
-
To edit several fills, select a group with Command–click or Shift–click, then Control–click and choose Properties to open the Area Properties dialog. To edit all visible fills of that type, Control–click and choose Global Properties.
-
On the work area, change the shape of the area by dragging points, or move the start
 , end
, end  and/or origin
  for fill areas. See Adjust a Fill Area.
Note: It is recommended to draw back to the start point. However, you can adjust the shape of the area afterwards in the work area.
Adjust a Fill Area
-
Click a fill area in the FilmStrip or work area to select it.
-
If another function is being used, in the Control Panel, click Edit Points
 .
. -
Drag one of the points defining the fill area to change its shape.
-
Hold the Shift key and click one of the points. The point becomes square and the lines on either side of that point become straight. Use Shift–click to create corners or straight lines.
-
Release the Shift key and click the point again. The point is round, and the line is curved.
-
Hold the Command key. The pointer changes to the Insert Points pointer
 .
.
Alternatively, use Insert Points .
. -
Click on the outline of the fill area. A point is added to the area outline.
-
Release the Command key.
-
Hold the Option (⌥) key, and move the mouse pointer over one of the points. The pointer changes to the Delete Points pointer
 .
.
Alternatively, use Delete Points .
. -
Click the point you just added. It is removed from the design.
-
Release the Option key.
-
Drag the start marker
 to a different point on the area outline. This position becomes the new start point for the fill area.
 -
Drag the end marker
 to a different point on the area outline. This position becomes the new end point for the fill area.
 -
Drag the origin marker
 to a different point on the work area. The orientation of the stitching in the fill changes as the marker is moved.
Note: After moving the origin, use Design Player to see the effect.