A design in mySewnet™ Digitizing is composed of areas, lines, columns and commands (objects).
After creating any fill or satin area, or satin column, you can emboss it by placing needle points to enhance the pattern.
Lines: Use lines as individual stitch lines or borders around an area or appliqué. 
Note: Lines are defined by points, which can be moved to change the shape of the line, and any area it encloses.
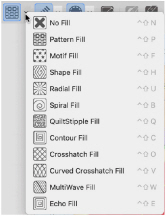
Choose a line type (e.g. satin line or running stitch) for a line, and a fill and line type (e.g. pattern fill, motif fill and so on) for each area.
Note: Any line type can be converted to another line type, and most area types can be directly changed to any other area type.
Columns: Create columns by placing alternate points.
Commands: Commands are instructions such as a change of thread color or a stop.
Note: Control–click to deselect a Create function when you have finished, or simply select another Create tool.
When an embroidery is created from a design, each line or area is converted to stitches, and the stitch order is controlled by the order of the objects in the design.
Note: You can see the order of objects in the FilmStrip.
There are several ways to add objects to a design:
-
Use the ExpressDesign Assistant or Quick Create from Background to create a whole design, with all the necessary lines, areas and commands. Edit or add to the design as desired.
-
Add new objects to a design which can be based on a picture shown in the background.
-
Insert complete design elements or copy and paste selections.
Select a Stitch Type
-
Decide which area or line type to create.
For example, a fill area with or without a border, a satin area, a column, or a line. You can also use the Trace options to follow a line in a picture. -
Select your stitch type from the pop-up menu(s).
-
Click the Options pop-up menu in the Create toolbar, and select the object type. The properties dialog for the stitch type opens.
-
Set the options for your selected stitch type, then click OK.
-
Use one of the create tools in the selected Create toolbar to start your design.
Note: If you use one of the QuickStitch™ tools you will need to load a background picture.
Creating Areas and Lines
Areas and lines are created using the QuickStitch™, QuickTrace, Point and Freehand features, or automatically with the ExpressDesign Assistant or Quick Create from Background.
Draw a line with the Freehand and Point features, or follow a line in a picture with QuickStitch™, QuickTrace and the ExpressDesign Assistant.
Note: You can change an open line to a fill area. The fill area is created by closing the gap between the line ends, or by using the Closed Border option on the Line tab of the Fill Area and Line properties dialog. The points defining the area are not changed. This allows you to create a fill area with a closed or open border.