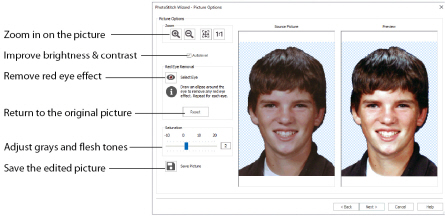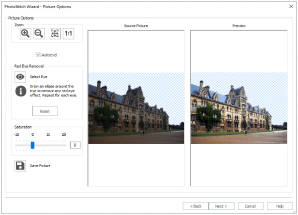
Use the Picture Options page to remove Red Eye from your picture, and to adjust saturation and contrast in the picture.
Autolevel improves brightness and contrast in most photos, and can be used to bring out the color in underexposed pictures.

By default Autolevel is enabled.
Autolevel does not make new adjustments each time a picture is loaded.
Occasionally Autolevel does not improve the appearance of a picture, and may need to be switched off.
Use Red Eye Removal
to reverse the red eye effect caused when flash is reflected back by the retina of the eye.
Red Eye Removal can also be used to remove other intrusive reds, such as red lights.
Use Select Eye
to select Red Eye removal.
Remove Red Eye Effect from a Picture
-
Click Select Eye

.
-
Use Zoom In

to magnify the affected area.
-
Draw an ellipse around the affected eye in the Source Picture panel. Any bright red in that part of the picture has a blue cast added to it, to counteract the red effect.
-
Check the result in the Preview panel.
-
Remove any other examples of red eye in the picture.
If you make a mistake, use Reset to reverse red eye removal, then try again.
Reset
Use Reset to reverse the effects of red eye removal.
Adjust saturation to change the amount of gray in your picture.
Saturation is best used on Color PhotoStitch and Color Tile PhotoStitch embroideries.
Move the Saturation slider bar to the desired setting, or enter a value directly in the box.
Adjust Saturation between -10 and 20 by typing in a number, clicking on the left or right of the slider bar or by clicking and dragging the slider bar. To make the image more gray, move the slider to the left or type a lower number in the box. To make the image warmer, move the slider to the right or type a higher number in the box.
The initial value for Saturation is 0.
To reverse changes to Saturation, set the value back to 0.
Use Save Picture
to save changes to a picture you have edited. The Save Picture dialog box appears.
The following file formats may be saved: Windows or OS2 Bitmap (.bmp), JPEG Low Quality (.jpg), JPEG High Quality (.jpg), Tagged Image File Format uncompressed (.tif) and Portable Network Graphics (.png).
Portable Network Graphics (.png) is recommended as it is relatively compact, yet preserves the colors of the photo.
Source Picture
The panel on the left shows the original picture.
Preview
The preview picture on the right shows the result of applying Autolevel, Red Eye Removal, and adjusting saturation.
Use the Zoom functions to change the view of the picture or embroidery.
Use Zoom In
to magnify the view. Move the pointer over the picture or embroidery and the pointer changes to the zoom in pointer

. Then either click a point you want to zoom in towards, or click and drag a rectangle around the area you want to zoom in to and release the mouse button to zoom. When zoomed in, use the scroll bars to move around.
Use Zoom Out
to shrink the view. Move the pointer over the picture or embroidery and the pointer changes to the zoom out pointer

. Then click a point you want to zoom out from.
Click Zoom To Fit
to fit the picture or embroidery to the preview area.
Click Real Size
to view the picture at its real size in pixels. This means that one pixel of the picture uses one pixel of the screen. Alternatively, view the embroidery at a magnification as close as possible to the Real Size setting you chose in mySewnet™ Configure.
Back
Return to the Remove Background page.
Next
Go to the Design Size page.