Shape fill areas use one of 75 different shapes. Vary the stitch density and use motif lines for the fill.
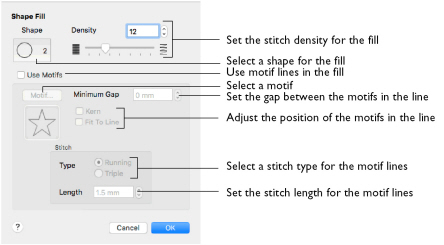
Density
Create a uniform fill at the chosen density. The lower the number, the closer together the stitches and the more stitches are produced. You can set Density from 2 to 40.
-
Use the slider or the number box to set the Density.
Shapes
Select one of 75 shapes for the fill.
-
Click the Shape button, and choose a Shape from the pop-up menu.
Use Motifs
Use a motif line instead of a plain line to follow the shape selected for the fill.
Note: The displayed motif is only used by Shape Fill if this option is selected.
-
Select the Use Motifs checkbox, then click the Motif button to choose a motif. See Motif Selection.
Minimum Gap
This is the minimum amount of extra stitching that is placed between the motifs along the line. Minimum Gap is in addition to any spacing that is part of the selected motif.
Fit To Line
Select how the motifs follow the curves of the line.
|
|
|
|
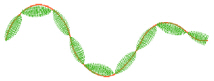
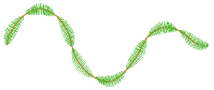
When Fit To Line is off, the ends of each motif are placed on the line. |
When Fit To Line is on, each whole motif is adjusted to fit along the line. |
Kern
Kern automatically increases the space between adjacent motifs, so that the motifs fit along the line without overlapping.
Stitch
Select between Running and Triple stitch for stitching out the motif line.
Set the maximum stitch Length from 1 to 12mm in steps of 0.1mm.
Note: Length is initially set to the recommended value for each motif.
Change a Shape Fill
-
Set the hoop size to 260mm x 200mm - Universal Large Hoop 3, and set the Orientation to Rotated. See Hoop Selection.
-
Open the SuperDesign window and choose "Zodiac" from the SuperDesign Category pop-up menu.
-
Scroll down the SuperDesign window to the Zodiac 3 set.
-
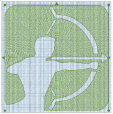
Click the design in row 1 column 3 (the archer).
-
Set Size to 190mm.
-
Click Apply. The SuperDesign is placed in the work area.
-
Control–click the SuperDesign and choose Shape Fill to change the fill properties.
-
Change the Shape from 2 (a circle) to 5 (a hexagon).
The curved lines in the background are now straight.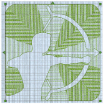
-
Control–click the SuperDesign and choose Shape Fill to change the fill properties.
-
Change the Shape from 5 (a hexagon) to 23 (a cross).
The background shows the cross pattern clearly. -
Use Undo twice to return to the circle shape.
-
In the Shape Fill dialog, set Density to 2 and click OK to view the changes. The the circular lines of stitching form a dense cover.
-
In the Shape Fill dialog, set Density to 40 and click OK to view the changes. The fill lines are widely spaced.
-
Use Undo twice to return to a Density of 12.

-
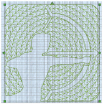
In the Shape Fill dialog, select Use Motifs. The motif options become available.
-
Click OK. The shape is now filled with concentric lines of stars (the default motif).
-
Open the Shape Fill dialog.
-
Set the Minimum Gap to 2mm and click OK. There are now gaps between the motifs in the lines.
-
Open the Shape Fill dialog and try out the effect of using Kern and Fit To Line.
-
Open the Shape Fill dialog and set the Minimum Gap back to 0mm.
-
Click the Motif button.
-
In the Motif selection dialog, choose Hand Stitches 1 from the Category pop-up menu.
-
Select motif number 11.
-
Click OK twice to close the Motif selection and Shape Fill dialogs. The archer SuperDesign shows the new motif.