Satin Column forms a column of straight or curving satin.
In the Satin Column dialog you can set the density, compensation, pattern (for columns wider than around 8-10mm) and underlay.
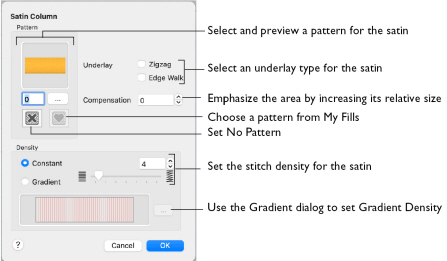
Pattern
Choose from more than 250 patterns for satin (for areas wider than around 8-10mm). The initial setting is 0. Add new patterns using Manage My Fills in mySewnet™ Digitizing.
View the patterns in the pattern viewer. See Fill and Satin Patterns.
Note: Patterns can only be used for columns wider than about 8-10 mm.
-
Click a pattern sample or enter the Pattern number to select a pattern.
-
Set the Pattern number to 0 for standard satin with no pattern, or click No Pattern.
Underlay
Choose Zigzag or Edge Walk underlay. Zigzag creates zigzag lines of running stitch as underlay. Edge walk places lines of running stitch just inside the edges of the satin areas.
Compensation
Compensation is used to make an area 'bolder' by increasing its relative size. Set Compensation from 0 to 30. The higher the number, the bolder the area appears. The initial setting is 0.
Density
Constant density creates a uniform satin at the chosen density. Gradient density creates a satin with varying density or color.
Setting Constant Density
The lower the number, the closer together the stitches and the more stitches are produced. You can set Density from 2 to 40.
-
Select Constant, then use the slider or the number box to set the Density.
Setting Gradient Density
-
Select Gradient, then click the ellipsis button (3 dots) to open the Gradient dialog. See Gradient.