PhotoStitch Embroidery Options
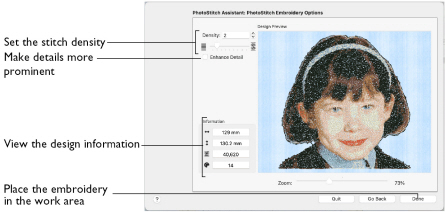
Use the PhotoStitch Embroidery Options page to change the stitch density and enhance detail in the picture. View and check the final design in 3D before closing the PhotoStitch Assistant.
Stitch Options
Use Density to change the number of stitches, or Enhance Detail to bring out the detail in the picture.
Enhance Detail: This makes details in the picture more prominent. For example, it can be used to improve definition in a photo with good detail, but little contrast.
Note: Enhance Detail does not change the colors used, it affects the way that those colors are used.
Density: Select the density of the stitching. 1 is the standard default density, 9 is the most open.
Zoom
Use the Zoom bar to change the view of the picture. Zoom in (drag the slider to the right) to magnify the view. Zoom out (drag the slider to the left) to shrink the view.
When zoomed in, use the scroll bars or swipe to move around.
Design Information
The design information boxes show the number of stitches in the embroidery, the height and width and the total number of color changes.
Go Back
If desired, use the Go Back button to go back through the PhotoStitch Assistant and modify settings before previewing the design again.
Done
Accept the final design and close the PhotoStitch Assistant.