Use the Create Border options to create a new embroidery with a border in the shape you have drawn and placed. There are three Create Border functions:
-
Create External Border

-
Create Internal Border

-
Create Overlay Border

Draw the desired border shape. Use either a preset shape with Border Shape
or draw your own shape with the Border Line

functions, Freehand Border Line

, or Point Border Line

. Move, scale, rotate and mirror the border shape as desired. Then use the desired Create Border function to create the new embroidery.
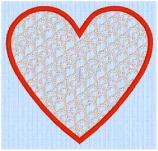
Use Create External Border
to remove the stitches outside the shape that has been drawn and add a border around the stitches.
Shortcut
-
Create Border, Border tab:

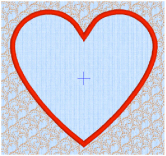
Use Create Internal Border
to remove the stitches inside the shape that has been drawn and add a border inside the stitches.
Shortcut
-
Create Border, Border tab

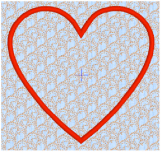
Use Create Overlay Border
to add the satin border on top of the embroidery.
Shortcut
-
Create Border, Border tab

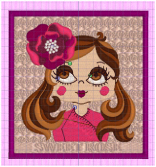
Add a Satin Border to the Sweet Rose Embroidery
-
Change the background color to pink. See Add a Basting Line to Sweet Rose Border.
-
Click File, New
 to open a new window.
 -
In the Quick Access toolbar, click Insert
 .
. -
In the folder Documents\mySewnet\Samples\Stitch Editor\Stitch load the 'Sweet Rose with Buttons' embroidery.
-
Click the Border tab.
-
In Stitch Type, ensure that Satin Line
 is selected, then click Options
  .
. -
In Satin Line, set the Width to 3.5mm, set Density to 4, and ensure Underlay is selected.
-
Click OK to close the Satin Line dialog box.
-
Click Border Shape
 .
.
-
In the Shapes drop-down list, select Shape 3 (a rectangle).
-
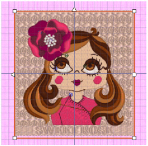
Click and drag to draw a rectangle that surrounds the embroidery, leaving a very small gap below.
The gap ensures that the border will not cover the embossed lettering.
If desired, click and drag one of the square corner handles to resize the border shape, or click and drag inside it to adjust the position. -
Click Create Overlay Border
 . A border is placed around the embroidery.
Alternatively, to create a quick border with more rounded corners, use Border Embroidery with the Margin set to 2mm.
 -
In the color worksheet, select the color at the bottom (the color for the border).
-
Click Thread Color
 . The Color Selection dialog box appears.
 -
Ensure that Robison-Anton Rayon 40 is selected in the list of thread ranges.
-
Browse for thread number 2500 (New Berry) in the list and select it, or type 2500 in the Find Thread box.
-
Click OK. The thread color is now a plum color.
To add a basting line around the embroidery, see Add a Basting Line to Sweet Rose Border.
Alternatively, you could use the embroidery you created in Make Diamond Stamp Buttons for the Sweet Rose Embroidery.