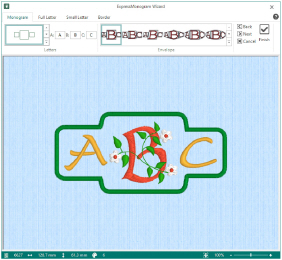
Select the ExpressMonogram Wizard
to create a monogram from a set of initials. The Monogram page of the ExpressMonogram Wizard will appear.
Select a font style, thread color, shape and size. Surround the monogram with a border. Alternatively, create a monogram with no border, then in the Frame tab add a Frame or Flourish, or a motif underline.
Progress through the pages using Next
and Back
to alter each setting, or click Finish
at any time.
Any existing monogram will be retained in the work area.
Shortcuts
-
Create Tab:

-
Keys: Alt, C, M
-
In the Wizard tab, click ExpressMonogram Wizard

to start the Monogram Wizard.
-
In the Monogram page, select a monogram type for an embroidery. Enter the initial letters for the monogram, and select Full, Small or a combination of both from the letters gallery, then choose an envelope.
-
Use the Full Letter and Small Letter pages to select the style for the letters in the monogram. Choose the font, size, color, spacing and stitch options for the letters.
-
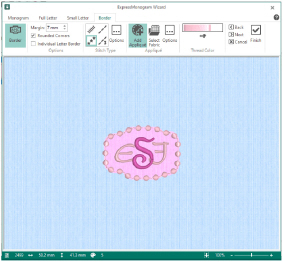
Create a border automatically from the envelope. The border can have rounded or square corners, and if the spacing is large enough, letters can be bordered individually. The available border types are satin or motif line, and running or triple stitch. Optionally, add appliqué fabric and placement lines.
-
Click Finish

to place the monogram in the work area. Its selection box will have pale green handles.
-
If desired, right-click at any time and choose Properties from the Context menu to return to the ExpressMonogram Wizard for adjustments.


The Monogram fonts are recommended for use with the Classic envelopes that use SFS (small, full, small characters), as they are designed with mainly even width characters.
Check the size in the status bar as you progress, to ensure the embroidery will fit in the desired location.
You can set the properties for each, and select the thread color for stitching it.

On the work area, use Save or Save As to save the monogram in a .vp4 file for later use.