Use the ExpressDesign Assistant to create new embroideries automatically from pictures.
Create an embroidery automatically from a picture. There are three embroidery types that can be created in the ExpressDesign Assistant: Express Embroidery, Express Trace and Express Border.
|
|
|
|
|
Convert color areas in a picture to fill and satin areas, outlining it with running stitch or satin line. |
Trace outlines in a picture. |
Create a border around shapes in a picture. |
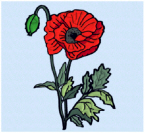
Express Embroidery: Create a new embroidery by converting color areas in a picture to fill and satin areas, using running stitch or satin border outlines where necessary.
Express Embroidery works best when using pictures that have well defined, flat color areas and outlines.
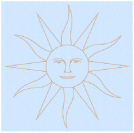
Express Trace: Create a new embroidery by tracing outlines in the picture. Use double trace or quadruple trace to create redwork or blackwork style embroidery, create quilt stencils and so on. Use satin line trace for larger designs, or when a bolder outline is more pleasing.
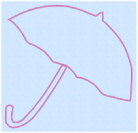
Express Border: Create a new embroidery by creating borders around shapes in a picture. The border can be created as a satin line, appliqué, an outline of running, double or triple stitch, or a motif line.
|
To learn how to |
Go to |
|---|---|
|
Create a full color Express Embroidery |
|
|
Create a Express Trace embroidery |
|
|
Create a Express Border embroidery |
|
|
Create a design from a vector graphic |
-
In mySewnet™ Embroidery, when the new embroidery is saved it is included in the project with any other embroideries that are on the screen.
-
In mySewnet™ Digitizing, the embroidery design is included in the .edo file with any other parts of the design that have been created later.
Create an Embroidery with the ExpressDesign Assistant
-
Start the ExpressDesign Assistant.
-
In the Choose Design Type page, select the desired design type from: Express Embroidery, Express Trace, or Express Border, then click Continue.
-
Select a picture in the Choose Picture page.
-
Step through the rest of the ExpressDesign Assistant.
-
When you click Done at the end of the assistant, the new embroidery is placed to fit in the center of the hoop, or where you drew the rectangle.
-
Choose File > Save (or press ⌘S) to save the new embroidery in .edo format.
-
Choose File > Export (or press ⌥⌘S) to save the embroidery in a format optimized for sewing.
• To create an embroidery that is a best-fit to the currently selected hoop, click Assistants
> ExpressDesign > ExpressDesign into Hoop.
• To create an embroidery that is a best-fit to a rectangular area you drag on the mySewnet™ Embroidery screen, click Assistants
> ExpressDesign > ExpressDesign into Rectangle.


