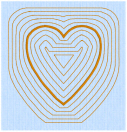
Echo Fill ![]() places echo lines within or around a shape. Choose from rounded, square and diagonal corners, and set the gap between the echo lines.
places echo lines within or around a shape. Choose from rounded, square and diagonal corners, and set the gap between the echo lines.
|
|
|
|
|
Rounded corners |
Square corners |
Diagonal corners |
Echo Fill Properties
The Echo Fill properties dialog enables you to place echo lines within a shape. Set the style, gap, stitch type and stitch length.
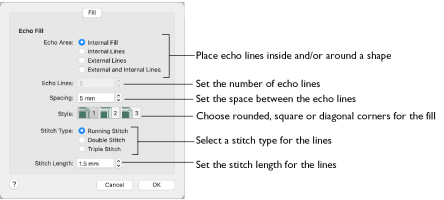
Style
Choose from 1, 2 or 3. For a square shape:
Rounded corners (1) is initially selected.
Stitch type
Select a line type for the echo lines in the fill. Choose from:
-
Running Stitch
-
Double Stitch
-
Triple Stitch
Spacing
Set the Spacing to the preferred distance between lines of stitching.
Set the Spacing from 2mm to 20mm in steps of 0.1mm. It is initially set to 5mm.
Stitch Length
Set the stitch length for the echo lines from 1 to 12mm in 0.1mm steps. The initial setting is 2mm.
Create an Echo Fill Heart
-
Set the hoop size to 100mm x 100mm - Universal Square Hoop 1. See Hoop Selection.
-
In Preferences set the Grid size to 10mm. See Grid Size.
-
Ensure that the Control Panel
 and FilmStrip
  are open.
 -
Click Quick Create
 , and in the stitch types area choose Echo Fill and Satin Line. See Select a Stitch Type.
-
Select the heart, number 71, in the Shape pop-up menu.
-
Click the Shape button
 . The heart is placed in the center of the work area as a selected block.
 -
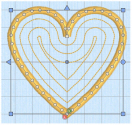
Hold down the Option key and the Shift key and drag one of the corner handles so that the heart is six squares high. Several echo lines appear.
Note: Shift resizes proportionally and Option resizes from the center. -
Control–click the heart in the FilmStrip and select Properties. The Area Properties dialog opens.
-
Set Spacing to 2mm and click OK. Closely spaced echo lines now fill the heart.

-
Control–click the heart in the FilmStrip and select Properties to open the Area Properties dialog.
-
Select Internal Lines and click OK. There are now only four echo lines within the satin line.
-
Open Area Properties and select External and Internal Lines, then click OK. Echo lines are placed outside and inside the satin line heart.
-
Open Area Properties and select Square Corners

, then click OK. The shape of the echo lines changes.
-
Try using Diagonal Corners

and changing the stitch type to Double Stitch or Triple Stitch.
