Use the Hole functions QuickStitch™ Hole ![]() , Freehand Hole
, Freehand Hole ![]() and Point Hole
and Point Hole ![]() to create holes in existing fill areas.
to create holes in existing fill areas.
|
To learn how to |
Go to |
|---|---|
|
Create a hole automatically |
|
|
Create a hole by drawing a line |
|
|
Create a hole by placing points |
Alternatively, use QuickStitch™ + AutoHole ![]() to add holes automatically during fill creation.
to add holes automatically during fill creation.
|
|
|
|
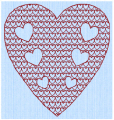
Fill Area with holes using Pattern Fill 111 from Hearts |
Fill Area with holes using Motif Fill Pattern 6 from General Motifs 1 |
|
|
|
|
Fill Area with Satin border and holes using Motif Fill Pattern 6 from General Motifs 1 |
Fill Area with Satin border and holes using Pattern Fill 109 from Hearts |
Create a Hole in an Area
-
In the work area, click the desired area to select it.
-
Choose Create > Draw Hole and choose the desired Hole function.
-
Cut the hole using the selected hole function.
-
Repeat to create more holes, as desired.
-
Control–click and choose "Finish..." to deselect, or simply select another Create tool.
Note: Choose from QuickStitch™ Hole (![]() ), Freehand Hole (
), Freehand Hole (![]() ) and Point Hole (
) and Point Hole (![]() ).
).


