Use Stamp Fill
to fill all visible stitches with the currently selected stamp. It is recommended to use Remove Needle Points In Fill from the visible stitches before using Stamp Fill.
|
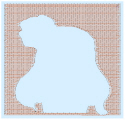
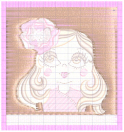
1. Original pattern in 2D with Stitch Points |
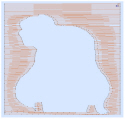
2. Needle points removed in 2D |
|
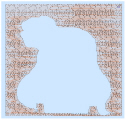
3. Rose used for Stamp Fill in 2D |
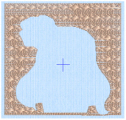
4. Roses in 3D |
To use Stamp Fill, isolate the stitches you want to stamp by hiding colors and/or using Draw Range, then use Remove Needle Points In Fill
to remove any existing pattern. Select your desired stamp and its Size and Angle, then click Stamp Fill
. An animation will play while the fill is calculated. When the process is complete, the visible stitches will be shown with the new pattern stamped in.
If you are not satisfied with the result, use Undo to undo the fill, then reselect Stamp Fill.
Shortcuts
-
Stamps, Emboss Tab:

-
Keys: Alt, E, SF
Stamp the Background of the Sweet Rose Embroidery
-
Change the background color to pink. See Add a Basting Line to Sweet Rose Border.
-
Click File, New

to open a new window.
-
In the Quick Access toolbar, click Insert

.
-
Browse to the folder Documents\mySewnet\Samples\Stitch Editor\Stitch.
-
Load the 'Girl with Rose' embroidery.
-
In the Control Strip, click Draw Next Color Block
 once so that the background color behind the girl’s head is shown.
 -
Click Ghost Mode
 . The stitches that were hidden are now shown in pale colors.
 -
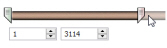
Move the Draw To End handle at the right of the slider bar to approximately stitch number 3114. This hides the background areas between the girl’s head and hair, and below her portrait.
-
Click the Emboss tab.
-
Click Remove Needle Points in Fill
 . The stitches making the flat fill pattern will be removed.
It is recommended to use Remove Needle Points in Fill before stamping an area of stitches. This is so that the new pattern or series of stamps is clearly visible, rather than adding to an existing fill pattern. -
Set Effect to Standard.
-
In the stamps area, select Plants in the Category drop-down menu.
-
Click the rose stamp (number 3) and it will be shown in the preview box for the stamps.
-
Click Single Stamp
 , then move the pointer over the work area. The pointer is now a rose.
 -
Place the rose pointer over the area between the girl’s shoulders and hair.
At the default size (10mm) the stamp is a little large to be used in this area; a smaller size would look better. -
Set Size to 8mm and move the pointer back over the work area. The pointer is now smaller.
The pointer uses the size and angle that you choose in the Stamps area of the ribbon bar. -
Click Stamp Fill
 . The new stitch points are calculated, then the new fill pattern will be shown, giving a sculpted rose background behind the girl’s head and shoulders.
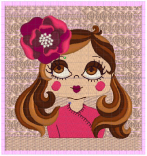
-
Click Draw All Stitches
 .
. -
Click Draw Next Color Block

. Only the background color is shown.
-
Move the Draw From Start slider at the left of the slider bar to approximately stitch number 7231, so that only the background showing between the girl’s hair and body is visible. The end number should be about 7586.
-
Click Remove Needle Points in Fill

.
-
Ensure that Standard is selected.
-
Click Stamp Fill

. The animation plays while the background area is decorated.
-
Click Draw All Stitches

.
Stitch numbers are given as guides only. It is more important to ensure that the correct stitches are hidden or left showing than to follow the exact stitch numbers.
To adjust stitch by stitch, use the arrows in the stitch number boxes.
Click in the space on the slider bar on either side of the handle to move it in that direction and change the stitch number by 50 at a time. You can also click and hold to change the number more rapidly, but the handle will stop when it reaches the arrow pointer.
You can change the stamp and stamp options while Single Stamp is selected. You can also do this when using Freehand Stamp Line

and Point Stamp Line

.

If this isolates a different part of the design, check that Effect is set to Standard, and stamp size is set to 8mm.
The end number has now changed to approximately 7922. The start and end numbers change as needle points are added and removed.
The movement stitch between these two small background areas is concealed by the girl’s jacket. It is recommended to hide any visible movement stitches before stamping, to ensure that they are not turned into normal stitches. In 2D view, movement stitches appear as dashed lines of stitches.
To add a name to the embroidery, see Add a Name Below the Sweet Rose Embroidery.