With Create a Text Stamp ![]() you can use the TrueType® or OpenType® fonts on your computer to create a stamp with your selection of letters.
you can use the TrueType® or OpenType® fonts on your computer to create a stamp with your selection of letters.
Only the outlines will be used to create needle points.
Choose from Regular, Bold, Italic or Bold Italic styles, and adjust the font size in points.
Enter the desired text and click OK. The text then appears in the preview in the Emboss tab. Adjust the Size and Angle as desired.
Create multi-line text by pressing ENTER while typing in the Text box.
Shortcuts
-
Stamps, Emboss Tab:

-
Keys: Alt, E, C
Add a Name Below the Sweet Rose Embroidery
-
Click File, New
 to open a new window.
 -
In the Quick Access toolbar, click Insert
 .
. -
In the folder Documents\mySewnet\Samples\Stitch Editor\Stitch load the 'Girl with Rose Background' embroidery.
-
In the Control Strip, click Draw Next Color Block
 . The complete background is shown.
 -
Leaving the flat fill background unchanged, set Effect to Super.
The Super effect creates a heavier impression as more needle points are removed surrounding the stamp. -
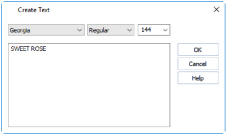
Click Create a Text Stamp
 . The Create Text dialog box will appear.
 -
In the left drop-down list, select Georgia as the font.
-
In the style (center) drop-down list, select Bold.
-
In the furthest right (font size) drop-down list, ensure that 144 is selected.
This affects the shape of the letters, but not their size in the stamp, as the stamp’s height can be changed before it is used. -
Click inside the text box. The pointer changes to an I-bar
 .
.
-
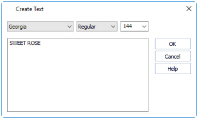
In the text box, enter the words:
SWEET ROSE -
Click OK. The stamp preview box now contains your text.
-
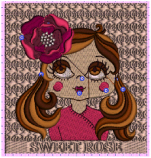
Click Single Stamp
 , then move the pointer over the work area. The pointer is now the text "SWEET ROSE".
 -
The lettering is slightly too large to fit in the space at the bottom of the picture. Set the Size to 6mm.
-
Move the stamp so that the letter ’T’ is over the center grid line.
-
Click to place the stamp.
-
Right-click to deselect your text stamp.
-
In the Control Strip, click Draw All Stitches
 .
.
Alternatively, you could use the embroidery you created in Stamp the Background of the Sweet Rose Embroidery.
It is not necessary to isolate the visible stitches with the draw range handles, as no needle points will be removed.
To add stamp buttons to the jacket, see Make Diamond Stamp Buttons for the Sweet Rose Embroidery.