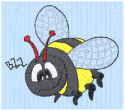
Curved Crosshatch fills use curving lines in the crosshatch, which can be used to create a feeling of depth. They are used in quilting, and to create free-standing lace.
|
|
The bumblebee wings are in Curved Crosshatch Fill, using Square style and a Gap of 4.0mm. |
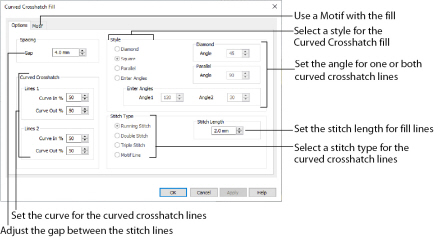
Curved Crosshatch Fill Properties
The Curved Crosshatch Fill properties dialog box enables you to set the curve, gap, style, line angle, stitch type and stitch length for the curved crosshatched lines of stitching in the fill.
You can also change the curves in the crosshatch lines using the handles in the work area.
Set the Gap to the preferred distance between lines of stitching.
Set the Gap from 1mm to 20mm in steps of 0.1mm. It is initially set to 5mm.
Choose from Diamond, Square, Parallel and Enter Angles. Diamond is selected by default, and creates a symmetrical crosshatch pattern (balanced horizontally). Choose Enter Angles to create an asymmetrical crosshatch pattern, if desired.
Enter an Angle for the Diamond fill. The Angle is initially set to 45 degrees.
There are no additional options for the Square fill which creates a crosshatch pattern of lines set at 90 degrees.
Enter an Angle for the Parallel fill. The Angle is initially set to 90 degrees.
The Pattern Fills 257 to 264 provide banded fill patterns that combine with crosshatch parallel fills to create a weave effect. Set Spacing for the parallel fill at 2.4mm to combine with Pattern 257, 2.8mm to combine with Pattern 258, and so on.
Enter an angle for each of the two line directions in the crosshatch. Angle1 is initially set to the same angle as the Diamond style previously used, and Angle2 is initially set to this angle plus 90 degrees.
Select a stitch type for the curved crosshatch fill. Choose from:
Set the Stitch Length from 1 to 12mm in steps of 0.1mm. The initial setting is 2.0mm.
Curved Crosshatch
Use Lines 1 and 2 to change the curve on the crosshatch lines.
You can also change the curves in the crosshatch lines using the handles in the work area.
Lines 1
Change the position of the origin for one of the sets of curved lines.
Set percentage Curve In and Curve Out from -100 to 100. The initial setting for Curve In % and for Curve Out % is 50.
Lines 2
Change the position of the origin for the other set of curved lines.
Set percentage Curve In and Curve Out from -100 to 100. The initial setting for Curve In % and for Curve Out % is 50.