Spiral fill areas use a spiral pattern from an origin point. Use constant or gradient density.
|
|
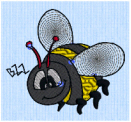
The bumblebee wings are in Spiral Fill using Gradient Density |
Density
The density on a spiral fill area can change over a range, or have multiple density changes from the origin to the edge of the fill. Choose from two density options: Standard and Gradient.
Embroidery on thicker fabrics usually looks better with more stitch coverage, or a low density setting. Choose a low value such as 2 or 3 for heavy knit fabrics, a higher value such as 5 or 6 for a light material like linen or satin.

Set the standard Density from 2 to 80. The lower the number, the closer together the stitches and the more stitches are produced.

The initial setting is 2.
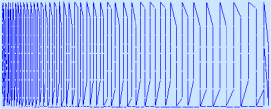
Use Gradient Density to change the density across the Spiral Fill. Set a value for the start and end density markers for the fill, and the density gradually changes between the two values. The start value is used at the origin of the spiral fill, and the end value is used at the edge.
The markers can each take a value of 2 to 80, which means you can reverse the gradient simply by swapping the start and end values.
The example shows a Gradient of 2 to 15, with a fill angle of 90°.
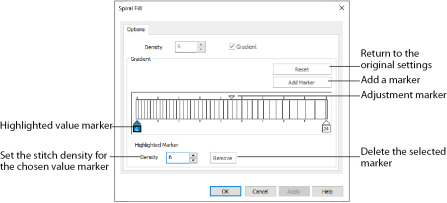
Use the marker above the gradient bar to change the gradient across the fill.
Add Marker
Click Add Marker to add a marker. The initial value for the marker will be between the existing markers. Edit the value and move the marker as desired.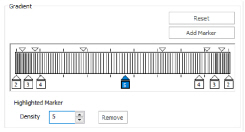
This means that you can have any combination of density values across the fill area. Remember, a higher value means the fill is less dense. The marker furthest to the left affects the spiral fill at the origin, then from left to right to the edge of the spiral fill.
Remove
Click Remove to delete the highlighted marker.
Use Spiral Fill with a Gradient
-
Click File, New
 to open a new window.
 -
In the Quick Access toolbar, click Insert
 .
. -
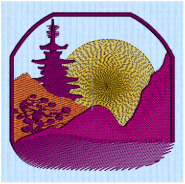
In the folder Documents\mySewnet\Samples\Stitch Editor\Stitch load the 'SunsetGarmentBagOriginal' embroidery.
-
Click the Object tab. The pointer changes to the Object Select
 pointer.
 -
Click to select the sun.
-
In the Convert drop-down list select "Pattern Fill to Spiral Fill". The Spiral Fill properties dialog box appears.
-
Click to select the Gradient checkbox. The Gradient area will become available.
-
In the Gradient area, ensure that the value marker on the left below the gradient bar is selected.
-
Click the value marker and change the value in the Density box to 2.
-
Click the value marker below the gradient bar on the right and change the value in the Density box to 8.
-
Click OK to view your changes.
All of the icons are unavailable (grayed out) as no area of stitches is selected.
Alternatively, right-click and a context menu appears. Select "Convert from Pattern Fill to Spiral Fill...".
You can move the adjustment marker above the gradient bar to vary the change in density across the fill, and click Add Marker to add another value marker and adjustment marker.