-
Click New

and the Design Options page of the Load Design Wizard will appear. Click Next to accept the default choice of Load Picture for a New Embroidery. The Hoop Size page of the wizard will appear.
-
Click Change Hoop and the Hoop Selection dialog box will appear.
-
Select 150mm x 150mm - Universal Square Hoop 2 from the Universal Hoop Group and click OK. The chosen hoop is previewed.
-
Click Next and the Choose Picture page of the wizard will appear.
-
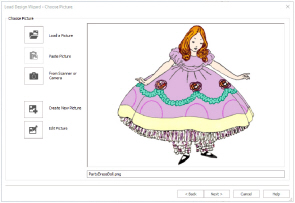
Click Load a Picture

.
-
In the Picture Viewer dialog box, browse to Documents\mySewnet\Samples\Sketch\Pics.
-
Click the 'PartyDressDoll.png' thumbnail, then click OK.
The picture will be loaded onto the Choose Picture page, with its name shown below the preview. -
Click Next and the Rotate and Crop Picture page will appear.
-
The picture is automatically cropped to remove as much of the detected background color as possible. However, it will be helpful to have a small margin around this picture, to ensure the embroidery is not too close to the edge of the hoop. Click Select All so that all of the picture is selected.
-
Click Next and the Picture Size page will appear.
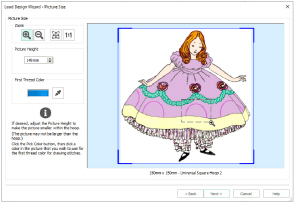
The Picture Size page also allows you to select the first color for drawing stitches in your new embroidery. We want to use the dark pink used for the semicircles around the bell of the dress. The lines are thin, but we can use Zoom In to enlarge the desired area, which will make it easy to pick the color. -
Click Zoom In

. The pointer will change to the zoom in pointer

.
-
Click and drag around the dark pink semicircle in the middle, then lift the pen or release the mouse button to zoom in.
-
Click the Pick Color icon

. Move the pointer over the picture and it will change to the pick color pointer

.
-
Click any part of the dark pink line. The Color Selection dialog box will appear. The thread chosen will be the nearest available dark pink to the color of the line, from the Import Thread Range selected in mySewnet™ Configure.
-
Click the drop-down arrow next to the Thread Range name and select Sulky Rayon 40 in the list. You may need to scroll up or down through the list to find Sulky Rayon 40.
-
The thread 1033 (Dark Orchid) should be selected automatically. If it was not, enter 1033 in the Find Thread box and 1033 (Dark Orchid) will be selected. Click OK and the thread sample will change to the new color.
-
Click Next and the Add Alignment Stitches page will appear.
-
Leave the Alignment Stitch Style as Place Crosses on Picture, and move the pointer over the picture. The pointer will change to a cross

, but only on the area of the picture where you may place crosses.
-
Click to place crosses at the tip of the finger on the left, then the tip of shoe on the right. Blue crosses show the alignment stitches. These are well defined features in the picture, which can be used for aligning the stitchout to the picture.
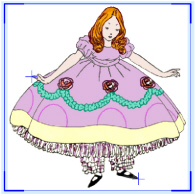
The tip of the shoe on the left is too close to the edge of the hoop, so it is not possible to place a cross here. -
Click Finish and the picture is shown on the work area.
-
Look at the status bar. The hoop size and embroidery size are shown.
It is not necessary to save this picture, as the picture was not rotated or cropped in the Load Design Wizard.
The two alignment crosses you placed are also shown over the picture on the work area. The color block is the Dark Orchid you selected in the wizard, ready for drawing stitches.
When a picture has a larger background, it is easier to allow the picture to be cropped with the default crop box, then reduce the size of the picture a little on the next page.

There is a margin on the inside edge of the hoop where you may not place crosses. This ensures all the stitches that make the crosses will be inside the hoop.
The corners of this picture are empty, so it is not recommended to use Automatic Corners.
To draw stitch lines on this picture, see Draw Free Motion and Zigzag Stitches on the Party Doll Dress.
Open the Driving Cat Embroidery in the Load Design Wizard
-
Click New

and the Design Options page of the Load Design Wizard will appear.
-
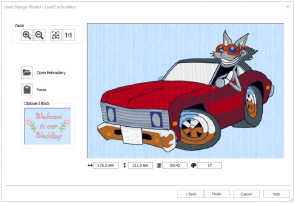
Select Load Sketch Embroidery and click Next. The Load Embroidery page of the wizard will appear.
-
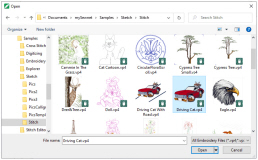
Click the Open Embroidery icon

and in the Open dialog box browse to the folder Documents\mySewnet\Samples \Sketch\Stitch.
-
Scroll down to the 'Driving Cat' embroidery and select it.
-
Click Open and the embroidery will be loaded onto the preview area.
-
Click Finish and the embroidery is shown on the work area in 3D in the hoop.
To add a road to this picture, see Create a Satin Line Road for a Cat.