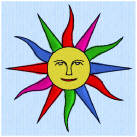
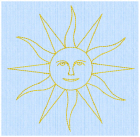
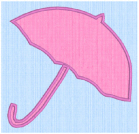
Use the ExpressDesign Wizard to create new embroideries automatically from pictures. There are three embroidery types that can be created in the ExpressDesign Wizard: Express Embroidery, Express Trace and Express Border.
|
|
|
|
|
Create a new embroidery by converting color areas in a picture to fill and satin areas, outlining it with running stitch or satin line. |
Create a new embroidery by tracing outlines in a picture. |
Create a new embroidery or appliqué design by creating borders around shapes in a picture. |
Create a new embroidery by converting color areas in a picture to fill and satin areas, using running stitch or satin border outlines where necessary.
Express Embroidery works best when using pictures that have well defined, flat color areas and outlines.
Create a new embroidery by tracing outlines in the picture. Use light or heavy running stitch to create redwork or blackwork style embroidery, create quilt stencils and so on. Use satin border of constant width for designs that demand broader outlines.
Create a new embroidery by creating borders around shapes in a picture. The border can be created as a satin border, appliqué, an outline of running, double or triple stitch, or a border of motifs.
Create an ExpressDesign Embroidery
-
Click the Create tab.
-
In the ExpressDesign drop-down list choose ExpressDesign into Hoop
 or ExpressDesign into Rectangle
  .
. -
In the Choose Design Type wizard page, select the desired design type from: Express Embroidery, Express Trace, or Express Border, then click Next.
-
Select a picture in the Choose Picture page.
-
Step through the rest of the ExpressDesign Wizard.
-
When you Finish, the new embroidery will be placed in the center of the hoop, or where you drew the rectangle, fitting proportionally, depending on the picture shape.
-
Use Save
 to keep the new embroidery in multipart .vp4 format.
 -
Use Export
 to save in other formats, and optimize for stitching.
ExpressDesign into Hoop
creates an embroidery that is a best-fit to the currently selected hoop and orientation.
ExpressDesign into Rectangle
creates an embroidery that is a best-fit to a rectangular area you draw on the mySewnet™ Embroidery screen with click and drag.
Choosing and Optimizing Pictures for the ExpressDesign Wizard
Express Embroidery Options (Choose Thread Colors and Fabric and Stitch Type Options)


