Use Alignment Stitches ![]() to mark the first or last subdesign as an alignment stitch subdesign.
to mark the first or last subdesign as an alignment stitch subdesign.

Alignment Stitch Sections
Either the first or last subdesign in a design can be marked as Alignment Stitches. In the Design  window an Alignment Stitch subdesign is shown by the letter ‘A’ in the Design Select area, rather than the number used for standard subdesigns.
Note: Most editing functions are not available for Alignment Stitch subdesigns. To edit the subdesign, change it to a normal subdesign, edit it, then change it back again after editing.
-
When a .vp4 design with alignment stitches is Opened, the alignment stitches are retained.
-
When a .vp4 design with alignment stitches is Inserted into a project, the alignment stitches are discarded.
Mark a Stitch Section as an Alignment Stitch Subdesign
-
Select the alignment stitch section on the work area using the select tools, then in the Modify
 window in the Control Panel
  click Alignment Stitches
  to flag the selection as a set of alignment stitches.
Note: To mark a set of alignment stitches as a normal subdesign, select the section, and then deselect Alignment Stitches  in the Modify window.
Using Alignment Stitch Sections
-
Click Hoop

and in the Universal Hoop Group, set the Hoop Size to 100mm x 100mm - Universal Square Hoop 1.
-
Select the Design

window in the Control Panel

.
-
Choose File > Open to open an existing design in a new window.
-
In the folder mySewnet/Samples/Stitch Editor/Stitch load the 'Small Cypress' embroidery.
-
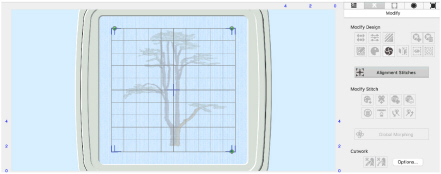
In the Design Select area, click design ’A’ - the alignment stitches. Most of the editing functions become dimmed (unavailable).
-
Select the Modify

window in the Control Panel

. Alignment Stitches
 is enabled, but all other functions are disabled.
 -
Click Alignment Stitches
 . The editing functions are now available.
 -
Select the Design

window in the Control Panel

. In the Design Select area the alignment stitch section is now subdesign 1, and the tree has been renumbered to 2.
-
Close the window without saving your changes.
-
Choose File > New to open a new window.
-
Choose Edit > Insert > Insert Design.
-
In the folder mySewnet/Samples/Stitch Editor/Stitch load the 'Small Cypress' embroidery.
-
Look at the Design Select area. This time there is no Alignment Stitch subdesign.
Note: The embroidery is opened with the second subdesign selected, the tree, as the first subdesign is alignment stitches.
Note: You cannot edit the stitches in an alignment stitch subdesign.
Note: When you Open an existing embroidery the alignment stitches are retained, as they are part of a complete design. However, when you Insert a design into an existing project, any alignment stitches are not needed, so they are not retained.
Convert the Alignment Stitches in a .VP3 Embroidery
You can change the alignment stitches in a .vp3 format embroidery into an alignment stitch subdesign:
-
Select the Modify
 window in the Control Panel
  .
. -
Use the Design Separator
 to create two different subdesigns; one for the embroidery, and one for the alignment stitches.
 -
In the Design Select area of the Design
 window, move the alignment stitches to the front (or back) of the design.
 -
With the alignment stitches selected, in the Modify
 window click Alignment Stitches
  to change them into an ’A’ alignment stitch subdesign.