Use Compensate Stitches ![]() to make a stitch block appear 'bolder' by increasing the relative size of the stitches by a factor of 1 to 15. Stitch lengths are increased at the edges of areas by the compensation factor. Only visible stitches are affected.
to make a stitch block appear 'bolder' by increasing the relative size of the stitches by a factor of 1 to 15. Stitch lengths are increased at the edges of areas by the compensation factor. Only visible stitches are affected.
Compensation allows for the effects of stitches' tendency to pull in, which varies according to fabric weight and type. A common use is to 'thicken up' lettering in an embroidery when it is being embroidered on knitwear, as lettering tends to have thinner columns relative to the rest of the embroidery.
Shortcuts
-
Modify Design, Modify Tab:

-
Keys: Alt, M, CS
Using Compensate Stitches
-
Click File, New

to open a new window.
-
In the Quick Access toolbar, click Insert

.
-
In the folder Documents\mySewnet\Samples\Stitch Editor\Stitch load the 'Racket' embroidery.
-
Click the Modify tab.
-
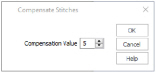
In the Modify Design area, click Compensate Stitches

. The Compensate Stitches dialog opens.
-
If the dialog covers the racket embroidery, move it to one side.
-
Enter 15 in the Compensate Stitches dialog box.
-
Click OK. Compensation thickens the handle and the edge of the racket head.
-
Close without saving.
Compensate Stitches works on the entire visible area. Hide colors and use Draw Range to isolate an area of the embroidery if you do not wish to affect the whole embroidery.