Use Set Background Name to save the finished background in a category and give it a name. The categories are the folder names you will see when browsing for existing backgrounds. Garment, quilt block or fabric categories are set separately.
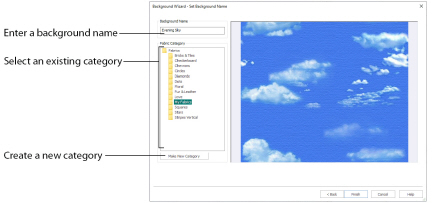
If you started with an existing picture, the picture name will be shown by default as the name for the new background. If you scanned a new picture, it will not have a name so you will need to enter a name.
Garment, Quilt Block or Fabric Category
There are three different groups of folders, one each for Garments, Quilt Blocks and Fabrics.
Garments
-
The default category is My Garments. To choose a different category, browse among the folders in Garments.
Quilt Blocks
-
The default category is My Quilt Blocks. To choose a different category, browse among the folders in Quilt Blocks.
Fabrics
-
The default category is My Fabrics. To choose a different category, browse among the folders in Fabrics.
Select from existing categories, or click Make New Category to provide the name of a new category.
Make New Category
To make a new category, click Make New Category, and enter a new folder name. Click OK to create the category.
The new category will be created as a subfolder for the currently selected type.
When make a new category, it will be available as a Fabric Category next time you use the Background Wizard.
Finish
Click Finish to save the new background with the specified name in the specified Category and close the Background Wizard. The selected or new background will be displayed in the work area.
Load a Garment in the Background Wizard
-
If required, click File, New Window, then click the View tab.
-
Click Change Hoop
 and in the Hoop Selection dialog box select 260mm x 200mm - Universal Large Hoop 3.
 -
Set Orientation to Natural and click OK.
-
Click Background Wizard
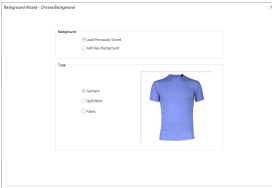
 . The Choose Background page of the Background Wizard appears.
 -
Ensure the setting for Background is Load Previously Saved and for Type is Garment.
-
Click Next. The Load Background page of the Background Wizard will appear.
-
Click Load Background
 .
. -
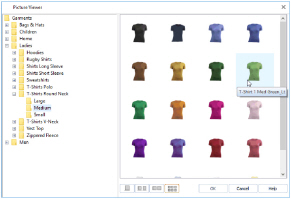
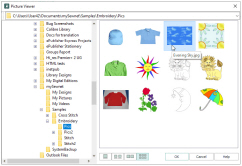
In the Picture Viewer dialog box, browse to the folder Garments\Ladies\T-Shirts Round Neck\Medium, and all the garments in the folder will be shown.
In some views, if you position the arrow pointer over a thumbnail without clicking, the name of the garment will be shown. The garment is called 'T-Shirt 1 Med Green_Lt'. -
Click the light green t-shirt to highlight it.
-
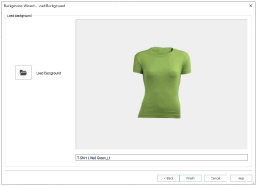
Click OK to load the t-shirt in the Load Background page of the wizard.
-
Click Finish and the t-shirt will be shown in the work area.
-
In the Quick Access toolbar, click Insert
 .
. -
Browse to the folder \mySewnet \Samples\Embroidery\Stitch.
-
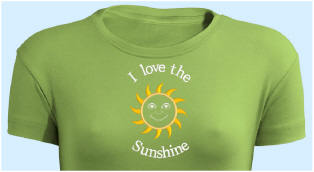
Scroll down to the embroidery ’Sunshine Applique Large with Lettering’.
-
Click to highlight the embroidery, then click Open to load it into the work area on the t-shirt.
-
Click Move and Rotate Background
 .
.
-
Click and drag the background so that the embroidery is at the top of the t-shirt.
-
Click Realistic 3D
 to view the embroidery on the t-shirt.
Make a New Fabric with the Background Wizard
-
Click the View tab.
-
Click Background Wizard

. The Choose Background page of the Background Wizard appears.
-
Select Add New Background under Background, and Fabric under Type.
-
Click Next and the Choose Picture page will appear.
-
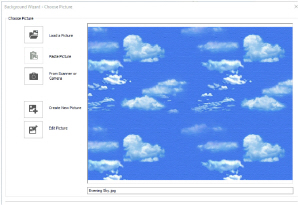
Click Load a Picture

and the Picture Viewer will appear.
-
In the Picture Viewer browse to the folder \mySewnet\Samples\Embroidery\Pics.
-
Click the picture of the sky with clouds to highlight it.
-
Click OK to load the picture into the Choose Picture page. The picture 'Evening Sky.jpg' is loaded onto the Choose Picture page, with its name shown below the preview area.
-
Click Next and the Rotate and Crop Picture page will appear.
-
The angle does not need to be changed, so do not rotate the picture.
-
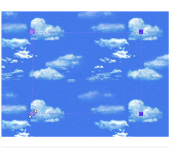
The picture on the left has a dashed outline around the area of the picture that will be cropped. Move the mouse over the handle at the bottom left of the dashed crop box so that the pointer becomes a double-headed arrow.
-
Click and drag the handle a little to the right and notice that the preview to the right changes as you move the crop line. Move the handle until the blue squares on the left of the crop box are each in the center of a cloud.
-
Also click and drag the top handles of the crop box down a little. The large clouds in the right-hand preview should be joined together as shown.
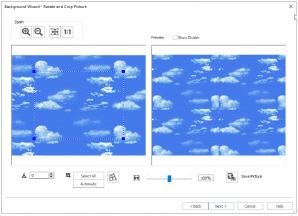
-
When you are happy that the clouds in the right-hand preview look correct, click Next. The Set Size page will appear, which is used to set a real-world size for the background.
-
Click and drag to adjust the arrows on the yellow measuring bar, so the line goes from the left edge of the background picture across to the right edge. In the ’Length of displayed line’ text box enter 240. The measurement and the measurement line are both shown.
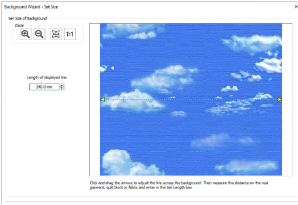
Notice that if you position the arrow pointer over the box the length is shown in inches. -
Click Next and the Set Background Name page will appear.
-
In the Fabric Category box, ensure My Fabrics is the selected category.
-
Leave the Background Name as 'Evening Sky', which is the same as the picture you loaded.
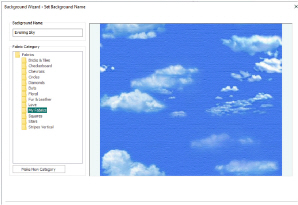
-
Click Finish. Your new background is loaded into the work area.
Create a new Garment in the Background Wizard
-
Click the View tab.
-
Click Background Wizard

. The Choose Background page of the Background Wizard appears.
-
Select Add New Background under Background, and Garment under Type.
-
Click Next and the Choose Picture page will appear.
-
Click Load a Picture

and the Picture Viewer will appear.
-
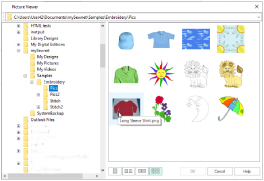
In the Picture Viewer browse to the folder \mySewnet\Samples \Embroidery\Pics.
-
Click the picture of the red long sleeve shirt to highlight it.
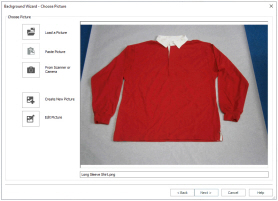
-
Click OK to load the picture into the Choose Picture page. The picture 'Long sleeve shirt.png' is loaded onto the Choose Picture page, with its name shown below the preview area.
-
Click Next and the Rotate and Crop Picture page will appear.
-
The angle does not need to be changed, so do not rotate the picture.
-
Click Perspective Correction

to remove the effects of perspective in this picture. The crop handles become red.
-
The picture on the left has a dashed outline around the area of the picture that will be cropped. Move the mouse over the handle at the bottom right of the dashed crop box so that the pointer becomes a double-headed arrow.
-
Drag both of the two bottom red handles so that the bottom crop line runs parallel to the bottom of the shirt.
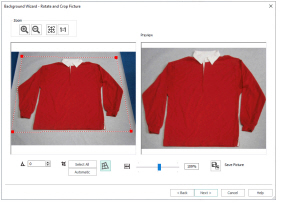
.
When you take a picture for a garment, hold the phone or camera so as to avoid reflected light and shadow on your subject. -
Drag the red handles at the top to remove the effects of perspective in the picture of the shirt in the Preview.
-
Use the Stretch Picture

slider to adjust the width of the picture in the Preview.
-
When you are happy with the appearance of the shirt in the Preview, click Next. The Set Size page appears, to set a size for the garment.
-
Click and drag to adjust the arrows on the yellow measuring bar, so the line goes from the left edge of the body of the shirt to the right edge.
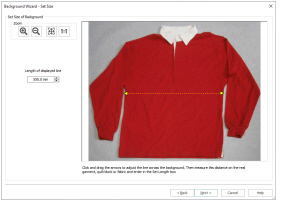
-
In the ’Length of displayed line’ text box enter 550mm. The measurement and the measurement line are both shown.
Notice that if you position the arrow pointer over the box the length is shown in inches. -
Click Next and the Set Background Name page will appear.
-
If needed, click Make New Category, then enter the name "My Garments" for your new garment category.
-
Click OK.
-
In the Garment Category box, ensure that My Garments is the selected category.
-
Leave the Background Name as 'Long sleeve shirt', which is the same as the picture you loaded.
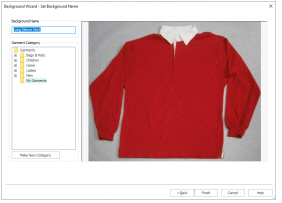
-
Click Finish. Your new background is loaded into the work area.
-
Drag the slider on the Zoom Bar at the bottom of the screen to the left so that you can see the whole shirt.
-
Click Move and Rotate Background

.
-
Click and drag the background so that the hoop is at the top right of the shirt.
-
In the Quick Access toolbar, click Insert

.
-
Browse to the folder \mySewnet \Samples\Embroidery\Stitch.
-
Scroll down to the embroidery ’Champion Dad’.
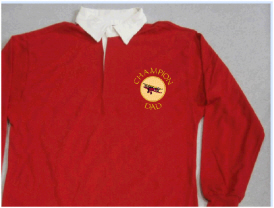
Alternatively, use the embroidery that you created in Create a Framed Badge: Champion Dad. -
Click to highlight the embroidery, then click Open to load it into the work area on the shirt.
-
Drag the slider on the Zoom Bar at the bottom of the screen to the left again so that you can see most of the shirt.
-
Click Realistic 3D

to view the embroidery on the shirt.