There are 29 Block templates available. Any Block type can be changed into any other Block type using the Handles menu, by adjusting the Top and Bottom line types, and by setting different Constraints.
Individual: When the Individual checkbox is selected, the letters can be moved and resized individually. Individual is available for all block types. Only one line of lettering can be made when Individual is selected. See Individual Letter Monogram.
Flip handles are not available. To mirror, fix the lettering as stitches first.
Handles Menu
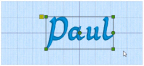
Use the Handles menu to adjust the settings for the selected block of lettering. Click the Handles menu icon ![]() and change the block settings.
and change the block settings.
Change Template Settings in the Block Menu
-
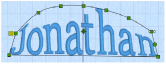
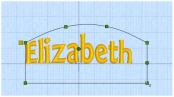
Enter the text "Jonathan" in the Letter window. See Create Lettering.
-
In the Lettering Shape area, click Arch Over
 , then click Apply
  . The lettering appears in the work area.
The top and bottom lines of the lettering use the Arch line type, with a single handle in the middle.
 -
Click and drag the lettering to the top of the work area.
-
Click and drag the two middle handles (top and bottom) upwards, to raise the height of the arch.
-
Click the Handles menu
 icon, and the handles menu opens.
Note that the line type for the top line is Arch .
. -
Click to deselect Match Top and Bottom Lines
 , then click to open the Bottom Line Type submenu. The line type for the bottom line is also Arch
  .
. -
In the submenu, change the bottom line to Straight
 .
.
The bottom of the lettering is now a straight line with a handle at each end. -
Open the Handles menu
 again, and change the top line to Diamond
  .
.
The top line forms a point, instead of a curve. The Double Diamond option forms a straight line with two peaks.
 -
Open the Handles menu
 again, and change the top line to Curve
  . The top line now has a curve with two handles.
 -
Move the two middle handles on the top line separately.
-
Open the Handles menu
 again, and select Add 3 points to curve
  . Three more handles are added to the top of the block.
The add and remove points options are only available when the line type is a Curve. -
Adjust the top line as desired.
While you can adjust the top and bottom as desired, the sides are still parallel straight lines, and if you move the handle at the top of one side, the handle at the top of the other side moves with it. This is Constraint - Size .
. -
In the Handles menu, select Constraint - Pennant
 .
.
-
Click and drag the handle at the top right upwards. The handle below it moves in the opposite direction.
With a rectangular block, this would create a shape like a pennant.
Hold down the Ctrl key to create a skewed rectangle effect. -
In the Handles menu, select Constraint - Perspective
 .
. -
Click and drag the handle at the top right to the left. The lines on the side of the block now form a slope.
-
In the Handles menu, select Constraint - Free
 . You can now move any of the corner handles in any direction you like.
Note that you can only drag the middle handles in the curve up and down. -
In the Handles menu, deselect Force Even Distribution
 .
. -
Drag one of the middle handles on the curve sideways. The letters move with the handle.
If you hold the Ctrl key while dragging, the proportions of the shape are locked. With Shift the shape is resized from the center.
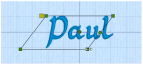
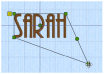
The functions in the Handles menu enable you to sculpt a block of lettering into almost any shape you like.
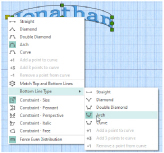
Top and Bottom Line Types
Select a line type for the top and bottom of the block to choose how the lettering is displayed.
|
Use Straight |
|
|
Use Diamond |
|
|
Use Double Diamond 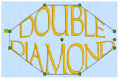
|
|
|
Use Arch 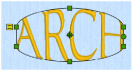
|
|
|
Use Curve You can add and remove extra points (handles) in a Curve. |


 (top) and
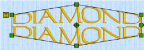
 (top) and

 (top) and
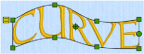
Add and Remove Points
Use the Add and Remove points functions to change the number of points in a Curve. The points are added or removed at the right end of the selected curve.
-

adds a single point to the right end of the selected curve.
-

adds three points to the right end of the selected curve.
-

deletes a single point from the right end of the selected curve.
The minimum number of points in a Curve is four.
Use Match Top and Bottom Lines  to use the same line type for the top and bottom lines in a block.
If Match Top and Bottom Lines

is selected, the Bottom Line Type submenu is not available.
Constraints affect how the corner handles on a block behave.
 is used, the two corners adjacent to the corner that is dragged move the same distance, in the same direction. The corner diagonally opposite does not move. The handles on the straight or curved lines between the corners move in proportion.
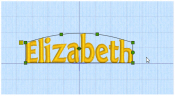
 is used, the corner above or below the corner that is dragged moves the same distance towards or away from the dragged corner vertically. The other two corners do not move. This forms a pennant shape.
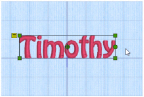
 is used, the corner to the right or left of the corner that is dragged moves the same distance towards or away from the dragged corner horizontally. The other two corners do not move. This gives a perspective effect.
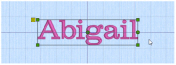
 is used, the corner handles can be dragged in any direction.
Force Even Distribution  distributes the handles between the two corners evenly.
Force Even Distribution affects both the top and bottom of the block.
There are 29 templates for use with lettering.
|
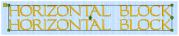
Use Horizontal Block Hold down Ctrl as you drag to resize proportionally, and Shift to resize from the center. Template Settings: Straight, Straight; Constraint - Size, Force Even Distribution Shortcut: Lettering Shape, Letter Tab: |
|
|
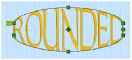
Use Rounded Template Settings: Arch, Arch; Constraint - Size, Force Even Distribution Shortcut: Lettering Shape, Letter Tab: |
|
|
Use Double Arch Template Settings: Arch, Arch; Constraint - Size, Force Even Distribution Shortcut: Lettering Shape, Letter Tab: |
|
|
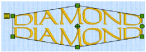
Use Diamond When the Individual checkbox is selected, each letter is created in a diamond-shaped envelope and can be moved and resized individually. 
Template Settings: Diamond, Diamond; Constraint - Pennant, Force Even Distribution Shortcut: Lettering Shape, Letter Tab: |
|
|
Use Italic When the Individual checkbox is selected, each letter is created in an italic envelope and can be moved and resized individually. 
Template Settings: Straight, Straight; Constraint - Italic, Force Even Distribution Shortcut: Lettering Shape, Letter Tab: |
|
|
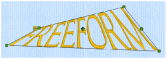
Use Freeform Template Settings: Straight, Straight; Constraint - Free Shortcut: Lettering Shape, Letter Tab: |
|
|
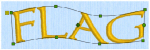
Use Flag Template Settings: Curve, Reflect Top and Bottom Lines; Constraint - Perspective, Force Even Distribution Shortcut: Lettering Shape, Letter Tab: |
|
|
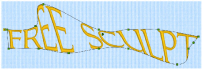
Use Free Sculpt Template Settings: Curve, Curve; Constraint - Free Shortcut: Lettering Shape, Letter Tab: |
|
|
Use Arch Over Template Settings: Arch, Arch; Constraint - Size, Force Even Distribution Shortcut: Lettering Shape, Letter Tab: |
|
|
Use Arch Under Template Settings: Arch, Arch; Constraint - Size, Force Even Distribution Shortcut: Lettering Shape, Letter Tab: |
|
|
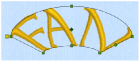
Use Fan Template Settings: Arch, Reflect Top and Bottom Lines; Constraint - Perspective, Force Even Distribution Shortcut: Lettering Shape, Letter Tab: |
|
|
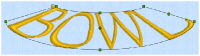
Use Bowl Template Settings: Arch, Reflect Top and Bottom Lines; Constraint - Perspective, Force Even Distribution Shortcut: Lettering Shape, Letter Tab: |
|
|
Use Pennant Right When the Individual checkbox is selected, each letter is created in a pennant-shaped envelope and can be moved and resized individually. Template Settings: Straight, Straight; Constraint - Pennant, Force Even Distribution Shortcut: Lettering Shape, Letter Tab: |
|
|
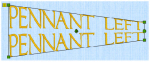
Use Pennant Left When the Individual checkbox is selected, each letter is created in a pennant-shaped envelope and can be moved and resized individually. 
Template Settings: Straight, Straight; Constraint - Pennant, Force Even Distribution Shortcut: Lettering Shape, Letter Tab: |
|
|
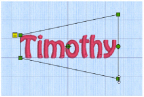
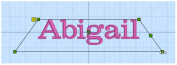
Use Perspective Increasing the Gap setting is recommended for Perspective lettering. When the Individual checkbox is selected, each letter is created in a perspective-shaped envelope and can be moved and resized individually. 
Template Settings: Straight, Straight; Constraint - Perspective, Force Even Distribution Shortcut: Lettering Shape, Letter Tab: |
|
|
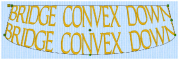
Use Bridge Convex Down Template Settings: Straight, Arch; Constraint - Perspective, Force Even Distribution Shortcut: Lettering Shape, Letter Tab: |
|
|
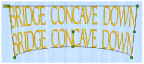
Use Bridge Concave Down Template Settings: Straight, Arch; Constraint - Perspective, Force Even Distribution Shortcut: Lettering Shape, Letter Tab: |
|
|
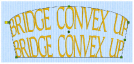
Use Bridge Convex Up Template Settings: Arch, Straight; Constraint - Perspective, Force Even Distribution Shortcut: Lettering Shape, Letter Tab: |
|
|
Use Bridge Concave Up Template Settings: Arch, Straight; Constraint - Perspective, Force Even Distribution Shortcut: Lettering Shape, Letter Tab: |
|
|
Use Octagon Template Settings: Double Diamond, Reflect Top and Bottom Lines; Constraint - Size, Force Even Distribution Shortcut: Lettering Shape, Letter Tab: |
|
|
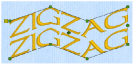
Use Zigzag Template Settings: Double Diamond, Reflect Top and Bottom Lines; Constraint - Italic Shortcut: Lettering Shape, Letter Tab: |
|
|
Use Chevron Template Settings: Diamond, Reflect Top and Bottom Lines; Constraint - Perspective, Force Even Distribution Shortcut: Lettering Shape, Letter Tab: |
|
|
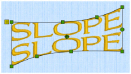
Use Slope Template Settings: Curve, Reflect Top and Bottom Lines; Constraint - Italic Shortcut: Lettering Shape, Letter Tab: |
|
|
Use Butte Template Settings: Double Diamond, Reflect Top and Bottom Lines; Constraint - Perspective Shortcut: Lettering Shape, Letter Tab: |
|
|
Use Gem Template Settings: Double Diamond, Diamond; Constraint - Perspective, Force Even Distribution Shortcut: Lettering Shape, Letter Tab: |
|
|
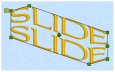
Use Slide Template Settings: Diamond, Reflect Top and Bottom Lines; Constraint - Italic Shortcut: Lettering Shape, Letter Tab: |
|
|
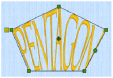
Use Pentagon Template Settings: Diamond, Straight; Constraint - Size; Force Even Distribution Shortcut: Lettering Shape, Letter Tab: |
|
|
Use Ramp Template Settings: Curve, Straight; Constraint - Italic Shortcut: Lettering Shape, Letter Tab: |
|
|
Use Rocket Template Settings: Diamond, Arch; Constraint - Perspective Shortcut: Lettering Shape, Letter Tab: |


-
Enter the text "Backwards" in the Letter window. See Create Lettering.
-
In the Lettering Shape area, click Horizontal Block.
-
Click Apply

. The lettering appears in the work area.
-
Drag the text a short distance to the right. A four–arrow pointer appears as you drag.
-
Place the pointer over one of the square green handles at the corners of the lettering. The Adjust/resize pointer

appears.
-
Use the handles to adjust the size and shape of the lettering.
-
Use the round handle on the right to rotate the lettering.
-
Undo

the rotation.
-
Right-click and choose Delete

to remove the lettering from the work area.
-
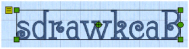
In the Letter window, select the checkbox labeled "Reverse".
-
Click Apply

. The lettering appears on the work area with the text mirrored.
-
Delete the lettering and deselect Reverse.
-
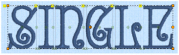
In the Letter window, select the checkbox labeled "Individual", and change the text in the box to "SINGLE".
-
Click Apply

. The lettering appears on the work area with each letter in its own selection box, and a multiple selection box with a dotted outline and orange handles.
-
To use a different lettering shape, choose a new lettering shape in the Letter window and click Apply again.
Hold the Ctrl key to keep the proportions.