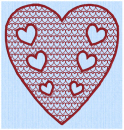
Use Point Hole ![]() to cut out holes within the currently selected fill area, by placing points or drawing Bezier Lines to define the holes.
to cut out holes within the currently selected fill area, by placing points or drawing Bezier Lines to define the holes.

This function only affects the currently selected fill area.
Shortcuts
-
Point Create Tab, Enhance:

-
Keys: Alt, P, H
Create a Point Hole in a Fill Area
-
Select the area in which you want to cut the hole.
-
Click the Point Create tab.
-
Click the Point Hole icon
 .
. -
Click to place the first point. It appears as a small hollow yellow circle.
-
Click to place a second point. The new circle is now yellow, and the previous circle is white.
-
Continue placing points around the desired area, such as a chosen section of the background picture. If you are following the picture, place a point every time the direction of the picture outline changes.
-
Right-click to complete the hole. The hole will appear in the fill area.
-
Continue to cut as many holes as desired.
To draw the hole with a Bezier Line, click Bezier Mode ![]() , then draw your hole. See Bezier Mode for information on drawing Bezier Lines.
, then draw your hole. See Bezier Mode for information on drawing Bezier Lines.
Curved lines are created automatically, unless fewer than three points are placed, in which case the lines will be straight. For corners and straight edges, hold down the Shift key. To delete the last point placed, use the Delete key.