Create a Monogram with a Border
-
If required, choose File > New.
-
Click the Hoop button
 and set the hoop size to 100mm x 100mm - Universal Square Hoop 1. See Hoop Selection.
 -
In the Create window

of the Control Panel

click ExpressMonogram Assistant
 . Alternatively, choose Assistants > ExpressMonogram Assistant.
The Monogram page of the ExpressMonogram Assistant appears. -
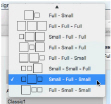
In the pop-up menu at the top left, choose the Small - Full - Small layout. This will produce a monogram with characters sized proportionally: small, full, small (SFS).
-
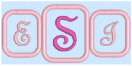
Enter the letters ’E’, ’S’ and ’J’ in boxes A, B and C.
Note: E, S and J represent the name Elizabeth Jane Smith, using traditional monogram style where letters are used in the order of given name, family name, middle name. If the letters were all full size, EJS could be used as an alternative. -
In the Envelopes window, choose the second envelope in the Classic category. Its name is SFS_Classic02.
-
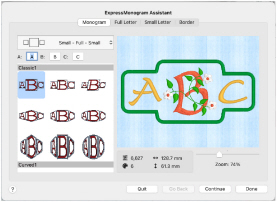
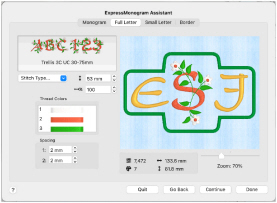
Click Continue, or click the Full Letter button. The Full Letter page appears.
-
Click the displayed font, and scroll down to see the fonts in the Monogram category.
Note: This category includes fonts that are recommended for the Classic envelopes using SFS (small, full, small characters).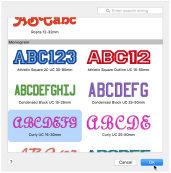
-
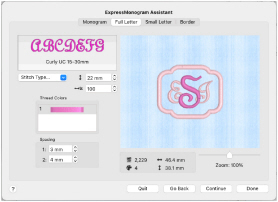
Click to select the font Curly UC 15-30mm, then click OK to close the viewer.
-
Leave the font size at 22mm.
The initial size of a font is midway in the font size range. -
Note that the Height
 and Width
  measurements below the preview have changed.
Use these dimensions as a guide to the size of your final monogram as you try different options. If you have a desired final size you may need to alter the font size, or the border. -
Click the pink thread, and in the Color Selection dialog choose Robison-Anton Rayon 40 in the Thread Range pop-up menu. The thread changes to Floral Pink, number 2415. Click OK.
Note: This only affects the letter S, as it is the only ’Full’ letter. -
Click Continue, or click the Small Letter button, and the Small Letter page appears.
-
Ensure that ’Alternative Letter Style’ is selected.
-
In the Font viewer enter "Curly" in the Search
 box. Two Curly fonts are shown.
 -
Click to select Curly UC 15-30mm, then click OK to use it for the small letters.
-
Note that the Height
 measurement below the font viewer has changed.
This is the height of the letter ’A’ for the small letter font. It should be within the recommended size range for the font (as mentioned in the font name). If the height is outside the recommended range, you may need to return to the Monogram page and change the envelope, or use the Full Letter page to change the full letter size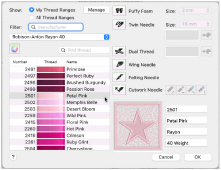
-
Click the pink color and the Color Selection dialog appears.
-
In the Thread Range pop-up menu choose Robison-Anton Rayon 40.
-
Scroll up and choose color 2501 (Petal Pink).
-
Click OK. The smaller letters are now a pale pink.
-
Click Continue, or click the Border button, and the Border page appears.
Note: The default border is a green satin line. -
Select Motif Line
 . The solid green border is replaced by a line of stars.
 -
Select Satin Line
 and the satin stitches appear again.
 -
Click the Thread Color button
 to display the Color Selection dialog.
 -
Ensure that ’Robison-Anton Rayon 40’ is selected.
-
In Find Thread enter 2501 and choose color 2501 (Petal Pink).
-
Click OK to close the Color Selection dialog. The satin border of the monogram is now pink.
-
Click the ’Individual Letter Border’ checkbox to place lines between the letters in the monogram.
-
To see individual letter borders in the monogram, the spacing must be increased. Click the Full Letter button to return to the Full Letter page.
-
Click the up arrow in Spacing 1 to increase the gap to 15mm. (This is the distance between the first and second letters.)
-
Click the up arrow in Spacing 2 to increase the gap to 15mm. (This is the distance between the second and third letters.)
The letters now have individual borders. This format may be desired when embroidering badges. -
For a traditional monogram effect, the letters may interlock. Set Spacing 1 to -3 mm, and set Spacing 2 to -4 mm.
-
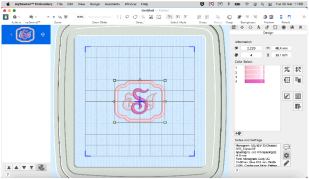
Click Done to close the assistant. There is a brief delay while overlap removal calculations occur, and the design is ColorSorted. The monogram is then displayed in the work area. (The density of the overlapping letters is quite low, so in this case no stitches are removed.)
-
Ensure that the Control Panel button
 is open at the Design window.
 -
Click Settings. The settings information appears in the Settings box.
-
Click Edit to see all of the text.
-
Click Actions
 on the toolbar and choose Export, or press ⌥⌘S.
 -
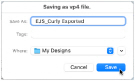
In the Export dialog, ensure that .vp4 is selected and click Continue.
-
In the saving as dialog, browse to mySewnet/My Designs, and save the embroidery as EJS_Curly. This saves a version ready for stitching out.
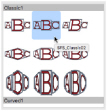
Note: If you position the arrow pointer over a thumbnail without clicking, the name of the envelope is shown. The name stands for Small-Full-Small, using the second envelope in the Classic1 category.
In this envelope the small characters are relatively larger than those in the envelope to the left, which will suit the curly initials to be used.
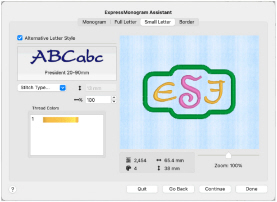
Note: If Alternative Letter Style is not selected, the same font and color are used for small letters and the full letters.
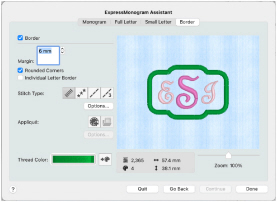
You can use a Motif Line
, a Satin Line
, or a Running Stitch
or Triple Stitch
line. You can also add appliqué fabric to the monogram.

Note: Although ’Individual Letter Border’ is now checked, borders do not appear between the letters as they are relatively closely spaced.
Note: If you position the arrow pointer over a measurement box without clicking, the alternative measurement is shown. You may also enter the alternative measurement with units of mm or " (including fractions) and it will be automatically converted.
The new positions of the letters can be seen in the Preview. The border adjusts to fit.
Note: The Settings give information on the letters, dimensions and font used in the monogram, including the font size for the large letter, and any patterns and fills used. This information can be used to recreate the monogram later, if necessary.
Click the Edit button if you wish to edit these notes. The Settings dialog is displayed. Amend the Settings as desired, then click OK to save your edits.
 on the toolbar and choose Save, or press
Note: This will save the monogram as a multipart .vp4 file. When you open or insert this file in the work area, Control–click and choose Properties to open it in the ExpressMonogram Assistant.
Note: You could use the Background Assistant to preview the use of this monogram on a blouse or towel. See Backgrounds.