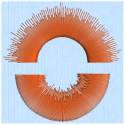
Feathered Satin forms a column of satin that is feathered on one, or both sides. A Feathered Satin column uses zigzag stitches where the start and end points of the stitches are random rather than all parallel.
You can choose whether one or both sides of the column will be feathered, and set the stitch length and density.
|
|
|
|
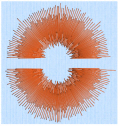
Feather Both Sides |
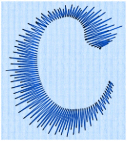
Feather One Side |


Feathered satin is used for realistic feathers or fur in animal designs, or shading in flowers. Typical shapes are arches, semicircles, circles and ovals, and squares, rectangles and triangles are also possible.
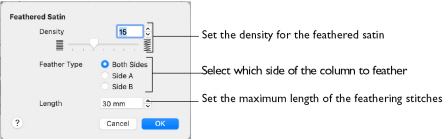
Use the Feathered Satin dialog to set density, Feather Type, and Stitch Length.
To show the Feathered Satin dialog
-
With a Feathered Satin column selected, Control–click and choose Edit Feathered Satin.
-
With a Feathered Satin column selected, click the Properties button.
-
Convert another column type to Feathered Satin in the Object window. The Properties dialog appears.
Adjust a Column of Feathered Satin
-
Open an embroidery including satin columns, and select a column.
-
In the Convert pop-up menu choose "Satin Column to Feathered Satin".
-
Click Convert. The Feathered Satin properties dialog appears.
-
Use the Feathered Satin dialog to set density, feather type, and maximum stitch length. Click OK to convert the column.
-
Drag the points making up the column to change its shape.
-
Use Shift–click when moving a point to make the point square, and create a straight section.
-
Click Insert Points
 , then click to add a pair of points to the column.
 -
Click Delete Points
 and click the pair of points you just added. They are removed from the design. Control–click and choose Finish Delete Points Tool to deselect Delete Points.
 -
With the feathered satin column selected, Control–click and choose Edit Feathered Satin to open the Feathered Satin properties dialog. Alternatively, click the Properties button.
-
Make any desired changes to the settings, then click OK to finish.
Note: You can change to any other type of column.
Density
Set Density from 2 to 40. The lower the number, the closer together the stitches and the more stitches are produced. The initial setting is 15.
Feather Type
Select which side of the column to feather. The available options are Both, Side A or Side B, according to the side where the first (A) or second (B) point was placed.
Stitch Length
Set the maximum Length of feathering stitches from 2 to 30mm in steps of 1mm. The initial setting is 30mm.
Feather Both Sides
Create a satin column with both edges feathered.
|
|
|
|
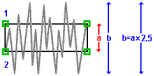
The start and end points of the stitches are random rather than all parallel. |
The final width of the section is 2-2.5 times larger than it is for standard satin, as shown. |
The maximum stitch lengths of the feathered satin may be from 2 to 30mm and the satin density may be from 2 to 40.
Feather One Side
Create a satin column with one edge feathered.
|
|
|
|
One edge is feathered, so the start and end points of the stitches on the feathered are random rather than all parallel. |
The final width of the section is 1.5 to 1.75 times larger than it would be for standard satin, as shown. |
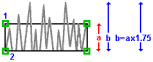
The maximum stitch lengths of the feathered satin may be from 2 to 30mm and the satin density may be from 2 to 40.
The side of the feathering is determined by the relative position of point 1. If desired, the feathered side may be altered in the properties dialog.