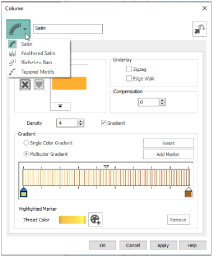
Use the Column functions to place one of the following column types: Satin Column ![]() , Feathered Satin
, Feathered Satin ![]() , Richelieu Bars
, Richelieu Bars ![]() or Tapered Motifs
or Tapered Motifs ![]() .
.
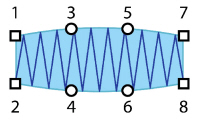
The first and last pairs of points in a column are always square (control points).
Right-click the created column to change its settings, or convert it to any other column type.

Create a Column
-
Click the Freehand Create or Point Create tab.

-
Set stitch options, then click the desired Column function and click to place the first point of your column (Point 1).
A movement stitch will be placed between the last object in the design and this point. -
Click to place Point 2 to start the other side of the column. A line will be placed to indicate the width of the column.
The first and last pairs of points in a column are always square (control points). -
Click to place Points 3 and 4 for the next section of the column. The first column section appears.
-
Repeat to place points indicating the width and position of the column. The outline shape of the column is drawn.

-
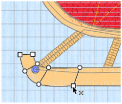
Right-click to place the column, or simply select another Create tool. The stitches for the column will appear in the work area.
-
Right-click a second time to deselect the function, or simply select another Create tool.
If desired, click the column to select it, and then right-click it to open the Column dialog. Here you can change the settings, or select a different column type from the drop-down list.
Draw a column with Bezier Curves
-
Click the Point Create tab.

Bezier Mode is only available in the Point Create tab. -
Select Bezier Mode
 .
. -
Set stitch options, then click the desired Column function and click and drag to place the first point of your column (Point 1).
A movement stitch will be placed between the last object in the design and this point. -
Click and drag to place Point 2 to start the other side of the column. A line will be placed to indicate the width of the column.
-
Click and drag to place Points 3 and 4 for the next section of the column. The first column section appears.
-
Repeat to place points indicating the width and position of the column. The outline shape of the column is drawn.

-
Right-click to place the column.
-
Right-click a second time to deselect the function.
If desired, click the column to select it, and then right-click it to open the Column dialog. Here you can change the settings, or select a different column type from the drop-down list.
The Bezier lines in a Column cannot be changed to a Point Line. See Convert to Point Line.