Use Calligraphy ![]() to draw calligraphic text and designs. The stitches are drawn in a zigzag, at the selected Calligraphy Angle. The stitch points are placed alternately on each side as you draw along the center of the zigzag.
to draw calligraphic text and designs. The stitches are drawn in a zigzag, at the selected Calligraphy Angle. The stitch points are placed alternately on each side as you draw along the center of the zigzag.
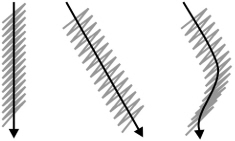
This picture shows how stitches will be drawn when the Calligraphy Angle is set to 45 degrees.

The stitches are drawn at the rate shown by the Free Motion Stitch Speed, at the current ZigZag Width.
Draw stitches on the work area, either using the pen on the drawing tablet (or with click-and-drag with the mouse). Stitches are added continuously while the pen is in contact with the tablet (or until the mouse button is released). Move the pen faster to spread out the zigzags, or slower to add zigzags close together for a satin effect.
Add as many sections of calligraphy as desired. A Trim

will be added at the end of a section. Right-click to deselect the function, or simply select another tool.
Any instruction book on using a pen for calligraphy can be followed for creating calligraphy in mySewnet™ Sketch. Simply draw with stitches instead of ink. Also, see the pictures in Documents\mySewnet\Samples \Sketch\PicsCalligraphy that show how to draw calligraphic lettering.
Shortcut
-
Free Motion, Free Page:

Create Lettering with Calligraphy
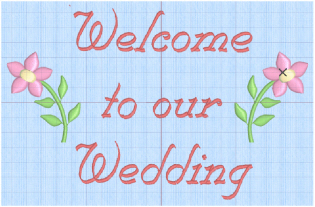
Either create your lettering freehand if you are good at calligraphy, or trace over some lettering you prepared on paper and scanned, or prepared on the computer screen.
-
Click New
 and in the Design Options page of the Load Design Wizard either select Load Picture for a New Embroidery to use some lettering as background, or select Start a New Embroidery with no Picture if you will work freehand. Then click Next.
 -
Select a hoop. Click Finish, or click Next to load a picture, and then complete the wizard.

-
Click the Free tab, and then click Calligraphy
 .
. -
Set the ZigZag Width to the width of the lines in the letters you will use.
In the example a width of 2mm is used. -
Set the Calligraphy Angle to suit the letters.
In the example the angle is set to 45 degrees. -
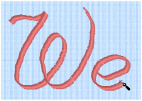
Draw the first letter in your text. Try to use a single pen stroke.
-
Lift the pen, or release the mouse button.
This is a test letter. Click Undo and adjust the settings if it was unsatisfactory.
Lift the pen, or release the mouse button, to create an Undo point. -
Move the slider to set the Free Motion Stitch Speed to a comfortable pace.
-
Draw another letter and make any further adjustments to the speed, or the line width and angle.
-
Draw the other letters in your text. Lift the pen or release the mouse button at the end of each stroke.
Drag it to the right to draw more stitches, and to the left to draw fewer stitches.
Zooming in will enable you to work more slowly, and may give more precision.
