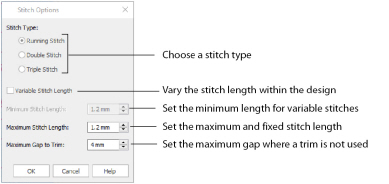
Use the Stitch Options dialog box to select a line type for your spiral design.
Create a Spiral Design
-
Click the Create tab.
-
In the Create tab, click Spiro
 . The Wizard opens.
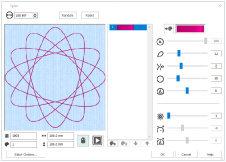
If you previously used the Spiro Wizard in this session it will open with the design that you created, otherwise the default settings are used. You can click Reset to return to the defaults. -
At the top left of the Spiro Wizard dialog note that Maximum Diameter
 is set to 100mm. This is the width of the design.
 -
Look at the panel on the right, noting the default settings.
The top setting Thread Color enables you to change the color of the selected line. Percent of Diameter
  below it is only available when your design uses two or more colors.
 -
Drag the Number of Petals
 slider slowly to the far left, to the number 2. Petal Type
  below is set to 1, now the only choice.
The number of options for a setting depends on the other settings used. If Number of Petals is set at 50, 19 Petal Type options are available. -
At the top, click Reset. There is a warning: "This will lose any changes. Do you want to continue?".
-
Click OK to return to the default settings.
-
Leaving the Number of Petals at the default 12, drag Petal Type
 so as to see all of the four variants, finishing with setting 3.
 -
Drag the Curvature
 slider to the right from 50 to 73 (a flower), to 90, and then to 200. Move slowly so as to see the changing patterns.
You could also enter the number into the number box for a precise value. -
Drag Rotation
 a small distance to the left or right. The whole design rotates.
-
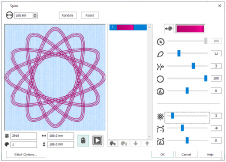
Set Number of Lines
 to 3. The single line for the design is replaced by three parallel lines.
 -
Drag Curvature Spacing
 (now -8) to the right to 0. The three lines merge.
There is now zero space between the lines. -
Drag Curvature Spacing further right to 20.
-
Then drag Rotation Offset
 to the right very slowly. The lines rotate relative to each other.
 -
Drag Rotation Offset to 15 to complete the first color for your design.
-
Below the color select box, click Add Color
 .
. -
In the Color Selection dialog, choose yellow in the Quick Colors and click OK. There are now two colors in the color select, and the design is yellow.
For more information on color selection, see Change an Existing Thread Color.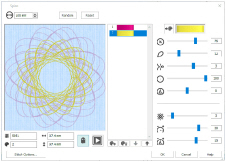
-
Drag the Percent of Diameter
 slider to 75% (from 100%). The new yellow design becomes smaller, revealing your original red design underneath.
The new color initially uses the same design as the color above. The original color is faded. -
Click Ghost Mode
 . The red threads are now their original brightness.
 -
Use the sliders to adjust your second design.
You can add more colors, or delete colors, and move colors up and down the color (stitch) sequence.
-
Click Stitch Options.
-
In the Stitch Options dialog, choose Triple Stitch.
-
Set Maximum Stitch Length to 2mm.
Maximum Stitch Length is used to set a maximum when Variable Stitch Length is used, or for fixed length stitches.
Use Maximum Gap to Trim to use Trims or stitches between your stitch lines. For example, use 2mm or 3mm for trims between spiral lines rather than stitches. -
Click OK to close Stitch Options.
-
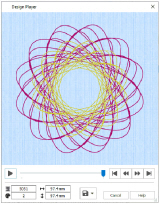
In the Spiro Wizard dialog, click Design Player
 .
.
For more information on Design Player, see Design Player. -
Click Play
 to play through the stitches in your design, and click Cancel to finish.
-
In the Spiro Wizard dialog, click OK to place the design on the work area.
-
Click Settings
 in the Notes and Settings area of the Design Panel.
 -
Click Edit
 . The Settings dialog opens with the complete settings for your design.
You can use these settings to recreate the design in Spiro Wizard. Use File, Print to print a worksheet with these settings. -
In the Create tab, click Spiro
 again. The Spiro Wizard opens with your settings preserved.
If you previously used the Spiro Wizard in a session it will open with the design that you created.
If you close mySewnet™ Embroidery, the default settings will be used the next time you open Spiro Wizard. -
Click Random. The warning message about losing settings is displayed.
-
Click OK to view a randomly created Spiro design.
Ghost Mode enables you to focus on the thread color that you are currently adjusting.
To add a color within a Spiro Wizard design, use Insert Color Command ![]() in the Modify tab or in mySewnet™ Stitch Editor to add a Color Change. See Insert Color Command.
in the Modify tab or in mySewnet™ Stitch Editor to add a Color Change. See Insert Color Command.
To change the line type to a Motif Line, open the Spiro Wizard design in mySewnet™ Stitch Editor and in the Object tab select the line, then use Convert to change the line to use the motif of your choice.
Use the Morphing tools in mySewnet™ Stitch Editor to change your spiral into a swirl!