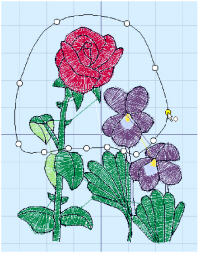
Use Point Select ![]() to select a block of stitches within an area of any shape made of straight and curved lines. Click Point Select and the pointer changes to the Point Select pointer
to select a block of stitches within an area of any shape made of straight and curved lines. Click Point Select and the pointer changes to the Point Select pointer  . Click a series of points to create an irregular outline of straight and curved lines around the desired area, using Ctrl+click to place a square (straight line) point. Click and drag
  to reposition an existing point. Click Delete to remove the last–placed point. Right-click when the area is complete. The block will show you the extent of your selection. Point Select may be easier to use than Freehand Select for precise selections. Right-click to deselect.

Use Add to Selection ![]() with any select function to increase the area of selected stitches, or use Remove From Selection
with any select function to increase the area of selected stitches, or use Remove From Selection ![]() to make the currently selected area smaller.
to make the currently selected area smaller.
This feature is only available in mySewnet™ Embroidery Extra.
The block can be moved, nudged, scaled and/or resized, mirrored horizontally and vertically and rotated to any degree. The block can be copied or cut to the clipboard and then pasted to the same or another embroidery. The block can also be deleted.
If the wrong area is selected, click in the work area, but outside the box, to deselect.
Shortcuts
-
Modify Tab:

-
Keys: Alt, M, SP