Choose a line type before drawing the line, or change it afterwards in Fill Area and Line properties.
Running, Double and Triple Stitches
Set Running Stitch ![]() from 0.3-12.0 mm in 0.1mm steps (standard, or cutwork needle lines with secure points). Set Double
from 0.3-12.0 mm in 0.1mm steps (standard, or cutwork needle lines with secure points). Set Double ![]() , Double Zigzag
, Double Zigzag ![]() and Triple
and Triple ![]() Stitch to any length from 1mm to 12mm.
Stitch to any length from 1mm to 12mm.
|
|
|
|
|
Running |
Double |
Triple |


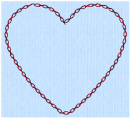
Double Zigzag is a special stitch type, recommended for lace. A running stitch line is retraced in a zigzag pattern to create a mesh.
Motif Lines ![]() are lines of the chosen Universal or machine motif patterns.
are lines of the chosen Universal or machine motif patterns.
Create Satin Lines ![]() where a line or border of satin stitches of constant width is desired. The line will be created along the center of the chosen line.
where a line or border of satin stitches of constant width is desired. The line will be created along the center of the chosen line.
|
|
|

Individual satin lines and the satin borders used around fills or appliqué are identical.
Select Appliqué ![]() to use appliqué fabric and placement stitches with a fill area that you create. Select an appliqué fabric in the Appliqué Selection dialog box, and choose a placement method in the Fill Area and Line options Appliqué tab.
to use appliqué fabric and placement stitches with a fill area that you create. Select an appliqué fabric in the Appliqué Selection dialog box, and choose a placement method in the Fill Area and Line options Appliqué tab.
Commands are instructions such as the Color Change ![]() that changes the thread at the start of a new color block. The Stop
that changes the thread at the start of a new color block. The Stop  tells an embroidery machine to stop without a color change.
Color changes, stops and alignment stitches are indicated by special blue, red and pink markers when in 2D or Object mode.
|
|
|
|
|
Color Change |
Stop |
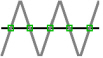
Alignment Stitch |


Use Alignment Stitches  to add stitches at the beginning of an embroidery that you can use to align the embroidery, for example if it is being stitched over a background picture.
Alignment Stitches are typically placed at the beginning of an embroidery. They will be inserted after the currently selected object, but may be moved if desired. Alignment Stitches are created as a cross, but may be altered after placement.
Single Stitch
Use Single Stitch ![]() to create single stitches that will be embroidered at whatever length they are made. Alternatively, if you select to Break Up into Smaller Stitches they will be broken up into stitches of Running Stitch at any length from 1mm to 12mm.
to create single stitches that will be embroidered at whatever length they are made. Alternatively, if you select to Break Up into Smaller Stitches they will be broken up into stitches of Running Stitch at any length from 1mm to 12mm.
Single stitches cannot be converted to any other line type.