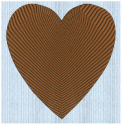
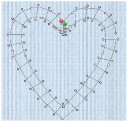
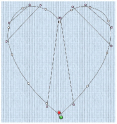
Stitch angle lines and start and end points can be adjusted on satin areas individually.
|
|
|
|
Satin Area created as a strip around the picture shape, so stitches are short enough to leave as plain satin |
Large Satin Area covering the whole picture shape, with a pattern to break up long stitches |
|
|
|
If the edge of the area does not match the background picture as closely as desired, you can move, delete and insert points in the work area. You can also move the green start  or red end
  markers.
Adjust a Satin Area
-
Click a satin area in the FilmStrip or work area to select it.
-
If another function is being used, in the toolbar click Edit Points
 .
. -
Drag one of the points defining the satin area to change its shape.
-
Hold the Shift key and click one of the points. The point becomes square and the lines on either side of that point become straight. Use Shift–click to create corners or straight lines.
-
Release the Shift key and click the point again. The point is round, and the line is curved.
-
In the Control Panel, click Insert Points
 . The pointer changes to the Insert Points pointer
  .
.
Note: Alternatively, hold the Command key to use the Insert Points pointer .
. -
Click on the outline of the satin area. A point is added to the area outline.
-
In the Control Panel, click Delete Points
 . The pointer changes to the Delete Points pointer
.
-
Note: Alternatively, hold the Option (⌥) key to use the Delete Points pointer

.
-
Click the point you just added. It is removed from the design.
-
In the toolbar, click Edit Points
 .
. -
Drag a hexagonal control point on one of the stitch angle lines. The stitching in the satin area changes.
-
Click Insert Points
 (or hold the Command key) and draw a line over the satin area that runs parallel to one of the stitch angle lines. A stitch angle line is added to the design.
 -
Click Delete Points
 (or hold the Option key) and click one of the hexagonal controls at the end of the line you just added. The stitch angle line is removed.
 -
In the toolbar, Edit Points
 .
. -
Drag the start marker
 to a different point on the area outline. This position becomes the new start point for the satin area.
 -
Drag the end marker
 to a different point on the area outline. This position becomes the new end point for the satin area.


