View and Adjust Appliqué Pieces
Use the appliqué features to view and adjust appliqué pieces. The appliqué fabric is shown under the embroidery, as it would appear when stitched out. An unlimited number of appliqué areas may be added to the work area.
How to place appliqué
The appliqué features show how a fabric would be placed. They do not alter the stitches.
-
To create new appliqué designs, or add a border, use the ExpressDesign Assistant or mySewnet™ Digitizing.
-
To add extra stitches and stop commands to an existing embroidery, use the Modify window or mySewnet™ Stitch Editor.
-
To place appliqué fabrics at a precise command it may be easier to navigate through the design in mySewnet™ Stitch Editor.
mySewnet™ Embroidery includes many Fonts, SuperDesigns and Frames with appliqué fabric, stitches and Stop Commands. The fabric and some stitch types may be adjusted using the Context menu.
-
To change the fabric pattern position, create holes or alter the outline, you must Fix as Stitches before using the features on the Appliqué window.
Note: Any fabric background may be used as appliqué, and any number of different appliqué fabrics may be used, as desired. Ensure that the correct design is selected before adding appliqué. Use the Command and the arrow keys to step through the embroideries.
Place Points to Add Appliqué to a Sun Embroidery
Appliqué Piece
Use the Appliqué Piece functions to add appliqué fabric to an existing design with appliqué areas, and to adjust appliqué areas within a design.
Change the Fabric in an Appliqué Embroidery
-
Click Hoop
 in the toolbar, and in the Universal Hoop Group set the Hoop Size to 100mm x 100mm - Universal Square Hoop 1. Click OK.
 -
Choose File > New to open a new window.
-
Choose File > Insert.
-
In the Open dialog browse to the folder mySewnet/Samples/Embroidery/Stitch.
-
Select the embroidery 'Night Time_applique', and click Open to load it.
-
Open the Appliqué window
 of the Control Panel
  .
. -
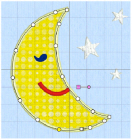
Click Next Piece
 . The points for the appliqué area for the moon are highlighted.
Note: All of the appliqué functions are now available. -
Drag the square zigzag fabric handle
 . The fabric for the moon moves.
Use the fabric handle to move the origin point (center of design) of a tiled fabric. -
Drag the round handle. The fabric for the moon rotates.
-
Click Select Fabric
 or choose that option in the Context menu. The Appliqué Selection dialog opens.
 -
To change the fabric, in Appliqué Type click Fabric, then click Load Previously Saved Fabric
 and in the fabric viewer choose a different fabric and click OK.
 -
Click OK to close the Appliqué Selection dialog.
Note: This handle  is only available for fabric tiles; you cannot rotate quick Appliqué or Pictures.
Note: The fabric rotates around the fabric handle (the origin point of the fabric tile).
Note: If there is more than one appliqué fabric in the design, click Next Piece  to view the second fabric.