Use Previous Piece
to select the previous Appliqué Piece in the stitchout order.
Note: Previous Piece will select an appliqué piece even if no appliqué piece is currently selected.
To select the previous appliqué piece
-
Select an embroidery with appliqué, and in the Appliqué window click Previous Piece

.
Select Appliqué Pieces
-
Click Hoop
 in the toolbar and in the Universal Hoop Group set the Hoop Size to 100mm x 100mm - Universal Square Hoop 1, then click OK.
 -
Choose File > New to open a new window.
-
Choose File > Insert.
-
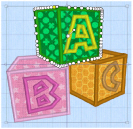
In the Open dialog browse to the folder mySewnet/Samples/Embroidery/Stitch and load the embroidery 'Blocks_fixed'.
-
Open the Appliqué window
 of the Control Panel
  .
. -
In the Appliqué window, note that the Select Piece button
 is available. This indicates that there is at least one appliqué piece in the embroidery.
 -
Click Select Piece
 , then click the A block. The points outlining the appliqué appear.
-
Drag one of the points to change the shape of the appliqué.
Note: You can change the shape of the appliqué area, but this does not affect the satin border. -
Undo to return to the original shape.
Note: You can also use the Fabric Handle to change the position and rotation of the fabric.
 -
Click Next Piece
 . The letter C block is now selected.
 -
Click Previous Piece
 twice. First the A and then the B are selected.
 -
Click Delete Piece
 . The appliqué fabric for the B block is removed, leaving the border lines for the brick.