Using the Split Project Assistant
-
Ensure you have an embroidery on the work area.
-
In the Design window
 of the Control Panel
  , click Split Project
  .
. -
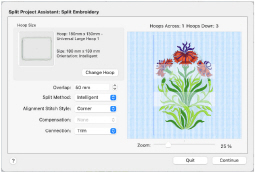
In the Split Embroidery page click Change Hoop to select a hoop.
-
Select a Hoop Group, a Hoop Size, and the Orientation.
Note: To minimize the number of hoopings when stitching out, select the largest single-part hoop for your embroidery machine. -
You can see the number of hoopings. If desired, increase or decrease Overlap to fit your embroideries within the hoop.
-
Click Continue to make a first split using these settings. If important features in the embroidery are split, click Go Back and adjust your settings.
-
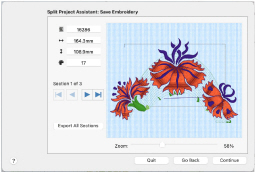
Click Continue. The Save Embroidery page appears.
-
Use the Previous
 and Next
  buttons to preview the splitting of the embroidery. Adjust the settings on the Split Embroidery page until satisfied.
 -
Click the Export All Sections button to save the split embroidery.
Browse to your My Designs folder, and name the project. The split sections will be numbered automatically. -
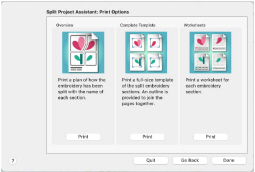
Click Continue. The Print Options page appears.
-
Print a plan and worksheets for your project:
• Overview prints a plan of the split sections, with section names.
• Complete Template prints a full size template of the split embroidery sections, with an outline around each section to indicate how to join them together.
• Worksheets prints a worksheet for each section. The worksheet gives the dimensions of the design, the total number of stitches, a full list of the threads used, and the number of stitches for each thread. -
Click Done to close the assistant.
• For Connection, use Running Stitch and not Trim if you have to split large stitch areas.
• Use Corner alignment stitches if lightly embroidered areas are split, and Baste if heavily embroidered areas are split. Some machines have special positioning features which do not require alignment stitches.
Note: The Overview and Complete Template may only be printed from Split Project.