In the Modify window you can select and change individual stitches and blocks of stitches in the selected embroidery, and add commands, stitches and ties.
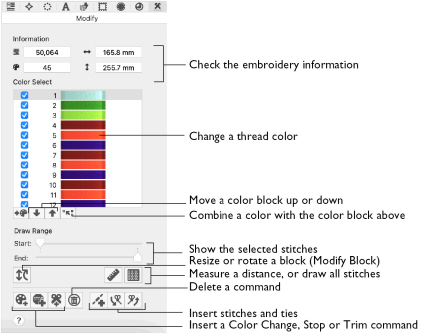
Select an embroidery, then open the Modify window to edit stitches and stitch blocks, to change, add and remove colors, to draw only the selected stitches, to add stitches and ties, and to add and remove Color Change, Stop and Trim commands.
Note: In the Modify window, embroideries are always shown as individual stitches in 2D mode. Zoom in close enough to see the separate stitches.
To Open the Modify Window
-
Click Control Panel
 , then click Modify
  .
.
|
To learn how to |
Go to |
|---|---|
|
Select an embroidery for editing |
|
|
Select stitches within an embroidery |
|
|
Select a block of stitches |
|
|
Use Box Select |
|
|
Use Freehand Select |
|
|
Use Point Select |
|
|
Create a single block from selected stitches and blocks |
|
|
Measure distances on the work area |
|
|
Change the stitch order of the colors in an embroidery |
|
|
View the stitch order and select a range of stitches |
Select an Embroidery to Modify
-
Open the Design window
 of the Control Panel
  .
. -
Select a small embroidery (for example, Bookend Teddy.vp4 in mySewnet/Samples/Embroidery/Stitch2/Toys) and place it in the bottom left corner of the hoop.
-
Load Bookend Doll.vp4 and Books.vp4 from this folder.
-
Open the Modify window
 of the Control Panel
  .
. -
Return to the Design
 window.
 -
Click the teddy embroidery to select it, then open the Modify
 window again. See Selecting Embroideries.
The last embroidery that you selected is in full color. The other embroideries are shown as pale images in Automatic Ghost Mode.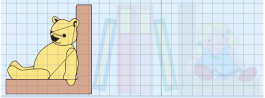
Note: Automatic Ghost Mode is used to show the position of the other parts of the design in the work area.
The teddy is now in full color, and the other embroideries are pale.
Note: The full color (editable) embroidery in the Modify window is the currently selected embroidery, or the first selected embroidery if several embroideries are selected, or the first loaded embroidery if no embroideries are selected. To select another embroidery, go to the Design window and press Command and the left or right arrow keys, or select the embroidery in the FilmStrip.