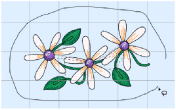
Use Freehand Select ![]() to select a block of stitches within an area of any shape. Freehand Select is useful when an area cannot be easily selected by using the simpler Box Select function. It is particularly useful to highlight part of a color area which could not otherwise be easily selected.
to select a block of stitches within an area of any shape. Freehand Select is useful when an area cannot be easily selected by using the simpler Box Select function. It is particularly useful to highlight part of a color area which could not otherwise be easily selected.

The block can be moved, scaled and/or resized, mirrored horizontally and vertically and rotated to any degree. The block can be copied or cut to the clipboard and then pasted to the same or another embroidery. The block can also be deleted.
Use Freehand Select
-
With the Modify window selected, click Freehand Select
 in the toolbar. Drag to draw an irregular outline around the stitches you want to select.
 -
Choose Edit > Freehand Select. Drag to draw an irregular outline around the stitches you want to select.
Select an Area with Freehand Select
-
Click the Control Panel button

on the toolbar, then click Modify.
-
If desired, use the Draw Range sliders and color worksheet to hide objects so that it is easier to see the required stitches.
-
Click the Freehand Select button

in the toolbar and the pointer changes to the freehand select pointer

.
-
Drag to draw an irregular outline around the stitches you want to select.
-
Lift the pen or release the mouse button to select the stitches. The area is closed automatically with a straight line between the last mouse position and the start position. The block will show you the extent of your selection.
-
If you want to make a new selection, click outside the current selection to deselect it. Then draw a new line around the required stitches.
-
Control–click and select Finish Freehand Select to cancel the Freehand Select tool.
Note: Use Add to Selection to add an area to your selection, or Remove From Selection to remove an area from your selection.