Use Insert Stop Command ![]() to add a command which instructs the embroidery machine to stop at the point where you click, displaying a message. A Stop command
to add a command which instructs the embroidery machine to stop at the point where you click, displaying a message. A Stop command  is shown by a red circle containing the letter S.
Use stop commands to transform an existing satin stitched 'outline' embroidery into an appliqué. Insert the stop commands so the appliqué fabric may be placed on the hoop, tacked down and trimmed. Stop commands may also be useful where a movement stitch might become trapped under the stitches that follow it.
To view Stop commands with their messages, use Draw Next Stop and Draw Previous Stop on the Control Strip, the Stitch Player or the Design Player. Alternatively, view Stop Commands and their messages in the printed worksheet.
Insert a Stop Command
-
Open an embroidery, then click the Modify tab.
-
Click Insert Stop Command
 and the pointer changes to the insert stop pointer
  .
. -
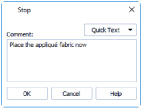
Click on a stitch. The Stop dialog box opens.
-
Use the Quick Text drop-down menu to insert a stitchout hint, or enter a message. See Stop Properties.
-
Click OK to place the Stop Command.
A large Stop command marker shows the place where the command was inserted.
 -
To cancel the function, right-click on the work area.
The Stop command marker will become smaller when Insert Stop Command is deselected.
Shortcuts
-
Modify Stitch, Modify Tab:

-
Keys: Alt, M, IS