Place letters along a straight, curved or wavy line. Use the handles to adjust the position of the letters and the shape of the line.
-
You cannot resize these lettering shapes with the handles. Right-click to open the Letter Properties dialog box, and use the Size and/or the Height and Width settings.
-
Flip handles are not available. To mirror, fix the lettering as stitches first.
-
These lettering shapes can only use one line of text, or two for Full Circle. Additional lines are combined with the first line, or the second line for Full Circle.
Circle Shapes
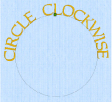
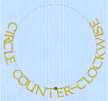
Place characters along a curved line. Circle lettering shapes always use Center alignment.
|
Use Circle Clockwise Shortcut: Lettering Shape, Letter Tab: |
|
|
Use Circle Counter-Clockwise Shortcut: Lettering Shape, Letter Tab: |
|
|
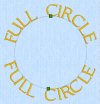
Use Full Circle If more than two lines of text are entered, Full Circle places all additional lines in the second line. Shortcut: Lettering Shape, Letter Tab: |
-
Rotate handles are not available for the Circle lettering shapes. To rotate, fix the lettering as stitches first.
Using Circular Lettering Shapes
The handles for circular lettering shapes adjust the positioning of the lettering, not the size.
-
Enter a short line of text in the Letter window. See Create Lettering.
-
In the Lettering Shape area, click Circle Clockwise.
-
Click Apply

. The lettering appears in a line over the top of a circle.
-
Click and drag the square green handle at the top of the circle of lettering downwards. The pointer changes to the circle size pointer

.
-
Undo

your change. The circle returns to its original size.
-
Hold down the Ctrl key and drag the green handle at the top of the circle to the right of the circle. The line of lettering moves to the right side of the circle.
If the lettering is outside the chosen hoop, the handle will be round, not square.
The circle becomes smaller, but the size of the letters is unaffected.
You cannot resize circular lettering shapes with the handles. Right-click and use the Size and/or the height and width settings in Letter Properties. See Changing Letter Properties.
The alignment setting does not affect circular lettering shapes.
Rotate and flip handles are not available. To rotate or mirror, fix the lettering as stitches first.
Fit to Straight and Wavy Lines
Use these line types to place lettering along a straight or wavy line.
Step: When the Step checkbox is selected, the letters can be rotated to any angle. Step is available for Fit to Straight Line and Fit to Wavy Line. See Fit Lettering to a Line.
-
Enter a short line of text in the Letter tab. See Create Lettering.
-
In the Lettering Shape area, click Fit to Straight Line.
-
Click Apply. The lettering appears along a sloping line.
-
Drag the square green handle on the right upwards. The angle on the line changes, but the size of the lettering, and the space between the letters does not.
-
Undo your change.
-
Drag the circular control along the line and to the right. The first letter of the lettering moves to the position of the circular control.
-
Delete the lettering.
-
In the Letter window, select the checkbox labeled "Step".
-
Click Apply

. There is now a green circular control at the end of a line below the lettering.
-
Drag the green control downwards. The letters in the line rotate.
-
Delete the lettering.
-
In the Lettering Shape area, click Fit to Wavy Line.
-
Click Apply

. The lettering is now on a wavy line with four square green handles, and two green circular controls.
-
Adjust the controls to change the position of the letters.
|
Vertical Block 
|
Use Vertical Block Hold down Ctrl as you click and drag to resize proportionally, and Shift to resize from the center. Lettering is created with Center alignment by default. For Vertical Block, this changes the alignment of characters in each column of lettering. Shortcut: Lettering Shape, Letter Tab: |


 There will be an additional round green handle at the end of another line. Click and drag this handle to rotate the letters to any angle.
