Use Print  to print a worksheet in 3D for the embroidery created from your design.
Print a Worksheet for an Embroidery
-
Click New
 and in the Design Options page of the Cross Stitch Design Wizard select Load Existing Cross Stitch Design, then click Next. In the Open Existing Design page, click Load a Design
and load Documents\mySewnet\Samples\Cross Stitch\Krz\Linnet.krz, then click Finish.
-
Drag the slider to the center of the Zoom bar to view the design at the size it will be stitched.
-
In the Home tab of the ribbon bar, click Design Properties.
-
In the Design Properties dialog box, ensure Thread Count, Crosses is set to Single (2 Threads). Click OK.
-
Click Edit Notes

on the Design Panel.
-
In the Notes text box in the Notes dialog box enter 'Family Photo' and click OK to save the notes.
-
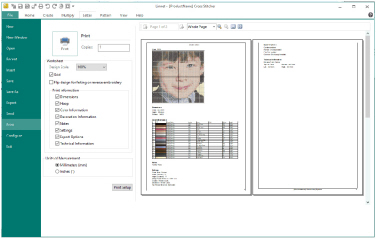
Click File, Print.
-
In the Print window ensure that Design Scale is set to 100%, deselect (uncheck) Grid and ensure all the Print Information options are checked.
-
Click Print and print the design.
Alternatively, use the design you created in Create a Cross Stitch from a Photograph, saved and exported as described in Create Cross Stitch and Embroidery Files for a Photo Design.
Look at the Print Preview. The preview shows the number of stitches and the cross size.
You can also print a worksheet using the Print

button in the Quick Access toolbar.