Use the Print Options page to print information on stitching and aligning your project.
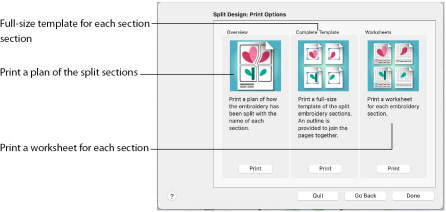
Overview
Print a plan of the splitting of the embroidery, with the name of each section, and the number of stitches in each.
In the Print dialog you can specify number of copies, the destination printer, and other printer setup options.
Complete Template
Print a full size template of the split embroidery sections, with an outline around each section to indicate how to join them together. See Using the Template.
In the Print dialog you can specify number of copies, the destination printer, and other printer setup options.
Worksheets
Print a worksheet for each embroidery section. The worksheets illustrate the embroidery section, and list the threads to be used, and the quantity of each thread.
Select the information to be printed with the embroidery, such as the Dimensions, Color Information and Technical Information. In addition, the scale may be altered and a grid turned on or off. Set the Units of Measurement for the Dimensions and Technical Information to millimeters or inches, as desired.
In the Print dialog you can specify number of copies, the destination printer, and other printer setup options.
Go Back
Return to the Save Embroidery page.
Done
Accept the final embroidery project layout and close Split Design.