Use Point Appliqué Outline  to place points to define a line of any shape to create an appliqué outline.
To create an appliqué outline with Point Appliqué Outline
-
Select the embroidery, then in the Appliqué window
 click Point Appliqué Outline
  and place points to draw the desired shape.
Create an appliqué outline with Point Appliqué Outline
-
Select an embroidery.
-
Open the Appliqué window

of the Control Panel

.
-
Click Point Appliqué Outline

.
-
Select a Color Command or Stop Command as a place to start the appliqué piece.
-
Place points to draw the outline.
-
Control–click, and in the Context menu choose Finish Appliqué Outline. The Appliqué Selection dialog opens.
-
Select a fabric, then click OK to place the Appliqué Piece.
Note: When hovering over a Color Command you will see the stitching that follows it.
Note: Hold down Command to place a corner point when creating or editing a line.
Add an Appliqué Fabric to a .VP3 Flower Bouquet Embroidery
-
Choose File > New to open a new window.
-
Click Change Hoop
 and from the Universal Hoop Group, set the Hoop Size to 100mm x 100mm - Universal Square Hoop 1. Click OK.
 -
Choose Edit > Insert > Insert Design and in the folder mySewnet/Samples/Stitch Editor/Stitch load the 'Appliqué Bouquet' .vp3 format embroidery.
-
Choose View and ensure that Show Commands is selected.
-
Open the Design window
 of the Control Panel
  .
. -
There are three green color blocks at the top of the Color Select section. Use the pointer to highlight the names; they are all the same thread.
Note: The appliqué stitch lines in this embroidery are marked by Color Commands rather than Stop Commands. -
Below the Control Strip, click Draw Next Color Block
 . The running stitch line outlining the embroidery is shown, with a Color command
  marker at the top.
 -
In the bottom left corner of the window, click the up arrow next to the numbers box to the right. At the top of the embroidery a second Color command marker
 appears.
Note: This is the start of the stitch line that secures the appliqué fabric. -
Open the Appliqué window
 of the Control Panel
  .
. -
Click Point Appliqué Outline
 .
. -
Click the second Color command marker
 (the upper one).
 -
Click to place points just outside the outline of the appliqué area.
Note: Hold down Shift to place a corner point. The second line of stitching lies just outside the first line, so add a slight margin for the fabric to be secured by this line. -
Move the points on the line to reshape it as desired.
-
Control–click and choose Finish Appliqué Outline. The Appliqué Selection dialog opens.
-
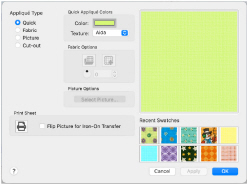
In Appliqué Type, ensure that Quick is selected.
-
Click Color, and in the Colors window, click Colored Pencils
 to select the Colored Pencils color model.
 -
Click the Honeydew pencil (a pale green).
-
Ensure that the Texture is set to Woven, then click OK. The appliqué piece can be seen in the work area, and the other appliqué options are available in the Control Panel.
-
Below the Control Strip, click Draw All Stitches
 .
. -
Drag any points in your appliqué line that lie outside the edge of the embroidery, so that none of the fabric overlaps.
-
Click outside the embroidery. You can no longer see the outline of the appliqué piece.
Note: Select Piece is available. This indicates that the embroidery contains an appliqué piece.
 -
Click Next Piece
 . Your appliqué piece is selected again.
 -
Click Select Fabric
 . The Appliqué Selection dialog opens again, with your selected fabric previewed.
Note: Use the Appliqué Selection dialog to change the fabric for existing appliqué. Audition new fabrics and visualize the effect using the Apply button. -
Click Cancel to close the dialog.
-
Click Design Player
 , then click Play
  to play the design from the beginning. The appliqué is placed after the first line of running stitch, and before the second line.
 -
Choose File > ⌥ > Save As (or ⌥⇧⌘S).
-
Save the embroidery in your My Designs folder as Appliqué Bouquet with Fabric.vp4.
-
Close mySewnet™ Stitch Editor, then open it again.
-
Open the file you just saved. You can see the appliqué piece that you created.


Note: You can use Insert Points  to add points to this line, and Delete Points
  to remove any unwanted points.

Note: You can also view the structure of the embroidery using the sliders on the Control Strip.
Note: In .vp4 format the appliqué information is saved.