Use Set Background Name to save the finished background in a category and give it a name. The categories are the folder names that you see when browsing for existing backgrounds.
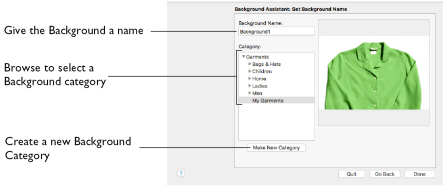
Background Name
If you used an existing picture, the picture name is shown by default as the name for the new background. If you scanned a new picture, it will not have a name so you will need to enter a name.
-
Enter a name for the background in the text box.
Category
Select a Category.
-
Save the background in the MyBackgrounds folder, or browse to another backgrounds folder.
Make New Category
Create a new Category within the selected Category. Enter a name for the new Category.
Note: For example, when adding a Garment background that is a shirt, you might add a category called Shirts to the My Garments category. This will create a subfolder called 'Shirts' within the 'My Garments' folder.
Zoom
Use the Zoom bar to change the view of the embroidery. Zoom in to magnify the view. Zoom out to shrink the view. When zoomed in, use the scroll bars to move around.
Go Back
If desired, use the Back button to go back through the Background Assistant and modify settings before previewing the design again.
Done
Click Done to save the new background with the specified name in the specified Category and close the Background Assistant. The new background is displayed in the work area.
Create a Garment in the Background Assistant
-
Click the Load Background

button on the toolbar.
The Choose Background page of the Background Assistant appears. -
Select Add New Background under Background, and Garment under Type.
-
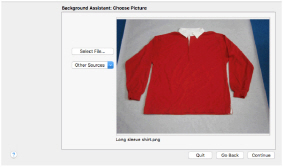
Click Continue and the Choose Picture page appears.
-
Click the Select File button.
-
In the Finder window browse to mySewnet/Samples/Embroidery/Pics.
-
Click the red long sleeved shirt to highlight it.
-
Click Open to load the picture. The picture 'Long sleeve shirt.png' is loaded onto the Choose Picture page, with its name shown below the preview area.
-
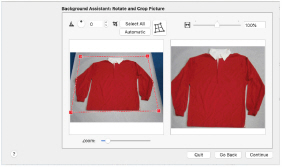
Click Continue and the Rotate and Crop Picture page appears.
The angle does not need to be changed, so do not rotate the picture. -
Click Perspective Correction

. The crop handles become red.
Note: Use Perspective Correction to remove the effects of perspective in a picture. -
The picture on the left has a dashed outline around the area of the picture to be cropped. Move the mouse over the handle at the bottom right of the dashed crop box so that the pointer becomes a double-headed arrow.
-
Drag both of the two bottom red handles so that the bottom crop line runs parallel to the bottom of the shirt.
.
Note: When you take a picture for a garment, hold the phone or camera so as to avoid reflected light and shadow on your subject. -
Drag the red handles at the top to remove the effects of perspective in the picture of the shirt in the Preview.
-
Use the Stretch Picture

slider to adjust the width of the picture in the Preview.
-
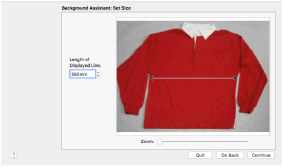
When you are happy with the appearance of the shirt in the Preview, click Continue. The Set Size page appears, to set a size for the garment.
-
Drag to adjust the arrows on the measuring bar, so the line goes from the left edge of the body of the shirt to the right edge.
-
In the ’Length of displayed line’ text box enter 550mm. The measurement and the measurement line are both shown.
Note: If you position the arrow pointer over the box the length is shown in inches. -
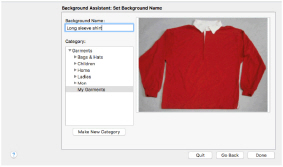
Click Continue and the Set Background Name page appears.
-
In the Garment Category box, ensure that My Garments is the selected category.
-
In the Background Name text box change the name to "Long sleeve shirt".
-
Click Done. Your new background is loaded into the work area.
-
Drag the Zoom Slider to the left so that you can see the whole shirt.
-
Click Move and Rotate Background

.
-
Drag the background so that the hoop is at the top right of the shirt.
-
Choose File > Insert.
-
Browse to the folder mySewnet/Samples/Embroidery/Stitch.
-
Select the embroidery ’Champion Dad’.
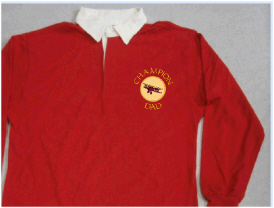
Alternatively, use the embroidery you created in Create a Framed Badge: Champion Dad. -
Click Open to load it into the work area on the shirt.
-
In the toolbar, click Realistic 3D

to view the embroidery on the shirt.