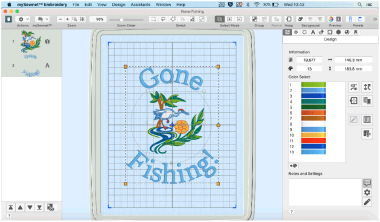
Welcome to mySewnet™ Embroidery
Use mySewnet™ Embroidery to adjust, modify, personalize and combine embroidery designs, frames and flourishes, and add appliqué and decorations.
To get started with mySewnet™ Embroidery, open it and create embroidery projects using lettering and SuperDesigns, or open an existing embroidery and modify it. Personalize your embroideries in true 3D in a real hoop. Rotate your embroideries to any degree, mirror them from side to side or end to end and scale or resize your embroideries. Use the FilmStrip to view your designs, and change their order. Adjust an unlimited number of designs and lettering ’side by side’ in multiple windows.
Adjust the colors to the thread shades from your preferred manufacturer, or even create your own threads, then combine with lettering or shapes. Select multiple designs and move them as a unit, or use Group to save the selected embroideries as a group. Cut, copy or paste and duplicate embroideries between mySewnet™ Embroidery Software apps. ColorSort when designing or Exporting to intelligently re-sort the color order of a design to reduce the number of thread changes.
Use 'Encore' to repeat embroideries in a circle, in 8 line and 50 shape options, or around the hoop. Use the Endless function to make endless embroideries for any hoop. Add appliqué and decorations to your designs.
Add multi-line lettering with your choice of 35 lettering shapes and flexibility to resize and reshape words, and space letters individually. Select machine motif stitches visually to create new designs or embellish existing ones, or add SuperDesigns. Surround monograms, names or any design with frames and flourishes or an automatic border. Adjust the fill, satin and line settings for many fonts and SuperDesigns.
Use Design Player ![]() to play through an embroidery, and Life View
to play through an embroidery, and Life View ![]() to view the embroidery in real-world perspective with the desired export options. Save your project with its design parts kept separate in multipart .vp4 format, and Export in the desired format according to the chosen options to optimize for sewing.
to view the embroidery in real-world perspective with the desired export options. Save your project with its design parts kept separate in multipart .vp4 format, and Export in the desired format according to the chosen options to optimize for sewing.
Create designs automatically from clipart or photos with the ExpressDesign Assistant and PhotoStitch Assistant. Create monograms, quilt blocks, word sculptures, in-the-hoop projects, spiral designs and fonts with the ExpressMonogram Assistant, Quilt Block Assistant, Word Sculpt Assistant, Project-in-the-Hoop Assistant, Spiro and QuickFont, and split large embroidery projects into sections for stitching out with the Split Project. Finally, view your project on your desired background.
Use 2D editing in the Modify window to alter individual stitches or whole blocks of stitches, even insert new stitches. Manage colors in your embroideries: move colors up or down, merge color blocks and insert color changes.
Move between mySewnet™ Embroidery Software apps using Edit Design to edit and adjust the selected part of your project in another app, or open a different app from the Welcome page or Create window.
-
Open mySewnet™ Embroidery by clicking its icon in the Launchpad, or by double-clicking its icon in the Finder. The mySewnet™ Embroidery work area appears.
Assistants
QuickFont
Use QuickFont ![]() to create new fonts for mySewnet™ Embroidery from most TrueType® or OpenType® fonts on your computer.
to create new fonts for mySewnet™ Embroidery from most TrueType® or OpenType® fonts on your computer.
Word Sculpt Assistant
Use the Word Sculpt Assistant
to create a word design automatically using your choice of outline, words, and fonts. Create your own outline, or adjust a system outline.
Name Changer
Use Name Changer ![]() to create a series of embroideries with varied lettering automatically from a template that you designed.
to create a series of embroideries with varied lettering automatically from a template that you designed.
Spiro
Use Spiro ![]() to create intricate spiral designs in multiple colors, using Running, Double or Triple stitch lines.
to create intricate spiral designs in multiple colors, using Running, Double or Triple stitch lines.
ExpressDesign Assistant
Use the ExpressDesign Assistant ![]() to automatically create embroideries from a picture, either to fit the current hoop or to fit an area you select. Choose from three design types:
to automatically create embroideries from a picture, either to fit the current hoop or to fit an area you select. Choose from three design types:
|
Express Embroidery |
Express Trace |
Express Border |
|
|
|
|
|
Create a standard embroidery using satin, fill areas and outlining. |
Trace outlines in a picture to create, for example, redwork, quilt stencils and so on. |
Create satin line, appliqué, running stitch, triple stitch or motifs around the edges of solid color areas in the picture. |


ExpressMonogram Assistant
Use the ExpressMonogram Assistant ![]() to create a monogram of up to three letters from a set of initials, choosing a font style, thread color, shape and size. If desired, add a border.
to create a monogram of up to three letters from a set of initials, choosing a font style, thread color, shape and size. If desired, add a border.
PhotoStitch Assistant
Use the PhotoStitch Assistant ![]() to create unique embroideries automatically from your own photos, to fit the hoop or selected area.
to create unique embroideries automatically from your own photos, to fit the hoop or selected area.
|
Color PhotoStitch Embroidery |
Sepia PhotoStitch Embroidery |
Monochrome PhotoStitch Embroidery |
Color Tile PhotoStitch Embroidery |
Linear PhotoStitch Embroidery |
|
|
|
|
|
|
|
Create an embroidery from a color photo, using multiple threads for a full color result. |
Create a sepia embroidery from a photo to give a heritage look, similar to old photos. |
Create a grayscale embroidery from a black and white photo. |
Create an embroidery from a color photo, generating small blocks of stitches with a tiled effect. |
Create a single thread embroidery from a photo, generating a linear pattern of stitches, or a Maze or Spiral effect. |


Project-in-the-Hoop Assistant
Use the Project-in-the-Hoop Assistant ![]() to create an in-the-hoop design using your choice of project type, style and dimensions.
to create an in-the-hoop design using your choice of project type, style and dimensions.
Family Tree Assistant
Use the Family Tree Assistant ![]() to create an embroidery chart of your family’s history quickly and easily.
to create an embroidery chart of your family’s history quickly and easily.
Quilt Block Assistant
Use the Quilt Block Assistant ![]() to create a filled or outline quilt block automatically. Place a quilting fill around an embroidery!
to create a filled or outline quilt block automatically. Place a quilting fill around an embroidery!
|
Filled Quilt Block; Inner Embroidery |
Outline Quilt Block; Filled Inner Shape |
Filled Quilt Block; Outline Inner Shape |
Filled Quilt Block; No Inner Shape |
Outline Quilt Block; No Inner Shape |
|
|
|
|
|
|
|
Create a filled quilt block surrounding an embroidery. |
Create an unfilled quilt block containing a filled shape. |
Create a quilt block with an unfilled shape, surrounded by a fill. |
Fill a quilt block with a motif or pattern. |
Create a quilt block without any internal shape or fill. |


Endless
Use Endless ![]() to create a continuous embroidery sequence.
to create a continuous embroidery sequence.
Split Project
Use Split Project ![]() to split your embroidery automatically for your preferred hoop.
to split your embroidery automatically for your preferred hoop.
Further Information
Reference Guide
The Reference Guide shows how to start the app and provides a quick tour of the main screen. The Reference Guide is supplied in PDF format ![]() , ready for printing, and contains full reference information.
, ready for printing, and contains full reference information.
Help
The integrated help contains full reference information. Click the Help button  . Where available, a help topic appears that is relevant to the selected item. Alternatively, use the Help menu.
Viewing and Printing PDF Guides
To find all the Reference Guides for your mySewnet™ Embroidery Software, go to the mySewnet™ Guides page, linked to from download.mysewnet.com. Select the desired PDF guide.
Note: To view and print the PDF Guides, you may use Preview which is included in your Mac OS®.
Readme
The most up-to-date details about the mySewnet™ Embroidery Software are in the Readme.rtf file available when you install your mySewnet™ Embroidery Software.
Sample Files
Samples are provided for your use. Download the sample files from the Downloads page: download.mysewnet.com. Copy the samples folder to the folder of your choice.
Note: For the exercises in this manual, the mySewnet folder is used.